It’s the little luxuries that people crave after a long day at work. And with a little creativity, some manufacturers are turning the average bathroom into a spa experience with high-end shower heads that come with special features. Lucky for us that learning how to change a shower head is one of the easier DIY projects around the home.
Choosing Your Shower Head
The first step is choosing the right shower head. Consider the newest features and weigh the benefit to cost. You’ll find LED mood lights, rain shower heads, mist settings, multiheaded systems, filtered shower heads, and more. You’ll even find shower heads with Bluetooth speakers!
Fixed shower heads
Fixed head showers are the simplest to work with but offer fewer options for upgrades. In this configuration, the supply water pipe is simply sticking out of the shower wall, covered by a flange for cosmetics. The shower head is attached directly to the pipe.
To change out a fixed shower head:
-
Ensure water is turned off at the tap.
-
Unscrew existing head counterclockwise until freed and remove
-
Clean soap scum or limescale from threads of the supply pipe
-
Wrap threads with plumber’s tape to ensure a tight seal
-
Attach new shower head by screwing it on clockwise until hand-tight
-
Turn on water to test
-
Hand-tighten as necessary to prevent leaks.
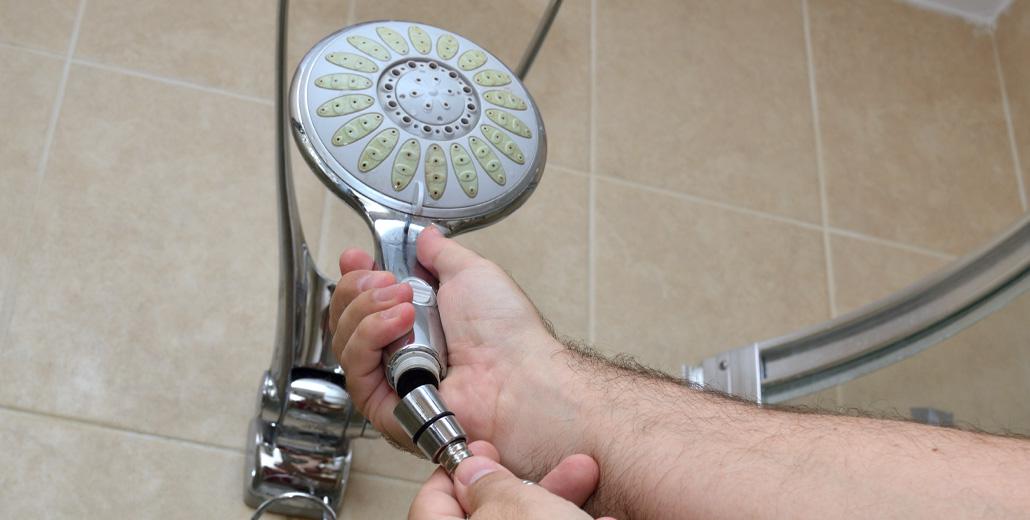
Hand-held shower heads
Hand-held shower heads are extremely convenient. Not only do they help you reach all the spots you need to clean, they’re also handy for washing kids, dogs, and the shower itself.
The good news is that they don’t take any special tools or skills to install.
-
Turn water off at the tap
-
Remove old shower head by unscrewing counterclockwise.
-
Clean supply pipe threads of dirt, soap scum, or limescale
-
Wrap threads on supply pipe with plumber’s tape
-
Screw new hand-held shower mount onto the water supply pipe and hand-tighten
-
Connect the shower head hose to the mount and to the shower head if not already connected
-
Place hand-head shower head into the cradle on the mount
-
Turn on water and check for leaks
-
Hand-tighten as necessary to stop leakage
Ceiling mounted shower heads
Most ceiling mount shower heads are “rain shower” heads, and you can simply follow the steps for a fixed head shower above.
Converting a wall mount shower to a ceiling mount shower is a task best left to the professionals. It requires rerouting the supply pipe, so most homeowners only make this upgrade during a complete renovation.
Looking for Something Different?
If you still have your heart set on that ceiling mount rain shower or are considering a shower system with multiple heads, it’s time to call the pros!
Make an appointment with the team at Benjamin Franklin Plumbing in Port St. Lucie. They can turn your run of the mill bathroom into that dream spa retreat.
 Your Privacy Choices