Key Takeaways About Plumbing Detection Technology
Plumbing detection technology refers to tools and methods that locate hidden leaks and pipe failures without unnecessary demolition. This summary is for homeowners and property managers who need quick decisions when they notice signs of moisture or drainage problems.
- Identify hidden leaks using acoustic scans thermal imaging or camera footage.
- Prevent larger damage by confirming issues early with measurable readings.
- Avoid unnecessary cuts by combining multiple noninvasive diagnostic tools.
- Spot sewer blockages cracks or root intrusion with video inspection runs.
- Reduce landscaping disruption by using electronic locators to mark repair points.
- Plan targeted repairs based on recorded footage readings and written reports.
Introduction
Hidden leaks and buried pipe damage often start small but cause big problems over time. Moisture behind walls, soft spots in flooring, and unexplained higher water bills are common signs. Modern plumbing detection technology helps find these issues without tearing up a house. Homeowners gain clearer fixes and less invasive repairs when problems are located accurately.
Acoustic sensors can listen for water moving through pipes even when you cannot hear anything. Thermal imaging reveals temperature differences that point to leaks in walls or under slabs. Video cameras inspect sewer lines and show blockages or root intrusion directly. Electronic detection equipment ties these signals together to give a precise location for the repair crew.
Detecting a problem early reduces drywall replacement, mold growth, and structural damage risk. A moisture meter reading or camera footage often proves there is an active leak before visible stains appear. For properties in Myrtle Beach, SC many homeowners face higher humidity that worsens hidden water problems. Acting on accurate diagnostic results prevents future headaches and larger bills.
When symptoms like dripping sounds, musty odors, or frequent clogging appear, professionals use a sequence of checks. They typically start with visual inspection then add acoustic or thermal scans followed by camera inspection if needed. The process produces measurable outputs such as recorded footage and moisture readings to confirm the issue. For homes near Conway, SC having clear diagnostic evidence helps decide the best repair path.
How Acoustic Leak Detection Works and When to Act
Acoustic leak detection uses sensitive microphones to pick up sound from moving water inside pipes and behind walls.
- Technicians place sensors on walls or floors
- They listen for consistent water flow noises
- Signals are amplified and recorded
- Comparisons across points narrow the leak location
Professionals start by noting homeowner observations like steady dripping sounds or changes in toilet behavior before testing further.
A common homeowner question is whether the method works through concrete, yes, acoustic detection can often find leaks under slabs when sounds transmit to accessible areas.
During diagnosis, a technician isolates supply lines, opens fixtures, and uses the sensor along pipe runs to triangulate the source.
If sounds are weak, specialists combine acoustic readings with a pressure gauge, dye test, or moisture meter to confirm a leak before any cut is made.
How Thermal Imaging Finds Hidden Plumbing Heat Patterns
Thermal imaging cameras detect small temperature differences on surfaces that indicate unseen water movement behind walls or under floors. Technicians scan walls, ceilings, and slabs looking for cooler patches that suggest evaporation from active leaks. The camera displays false-color images that make cooler and warmer areas easy to compare at a glance. A clear thermal pattern helps decide where to probe further without wide demolition.
Thermal scans work best when the leak causes a measurable temperature contrast with surrounding materials. Insulated pipes, hot-water lines, or sun-warmed surfaces can affect readings, so professionals interpret images in context. They often combine thermal pictures with a moisture meter reading to confirm that a cool spot has elevated moisture. That combination reduces false positives from ordinary temperature variations.
During diagnosis a technician documents thermal images alongside camera footage or pressure readings to build a complete case for repair. For example, a homeowner notices a soft spot and stained trim, a thermal scan shows a cool vertical streak and a moisture meter confirms wetness. The team then plans targeted access to the pipe based on the mapped pattern and measurements. This approach limits wall openings and speeds repair decisions.
Thermal imaging is noninvasive, but it has limits when temperature differences are very small or when surfaces hide the signal. In those situations technicians may follow with electronic detection or a sewer camera inspection to pinpoint the issue. Homeowners should know that high humidity can sometimes reduce thermal contrast, so further testing is common.
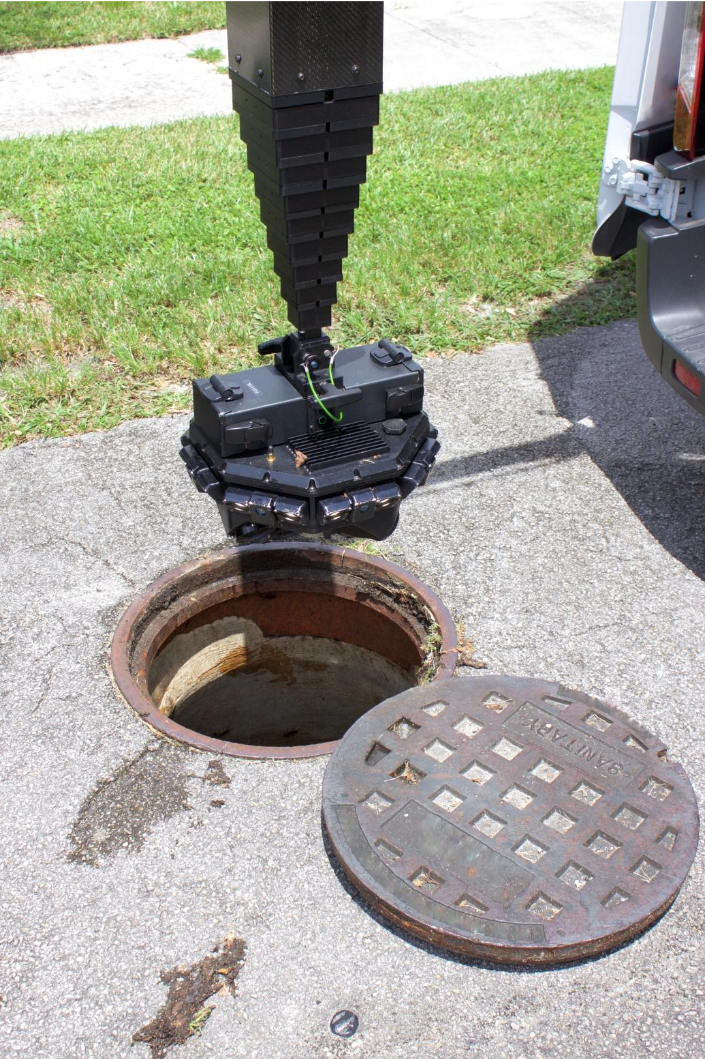
Photo from iStock - Credit: Lawrence Glass
How Video Camera Inspections Work and Next Steps
Technicians feed a flexible video camera into drains or access points to visually inspect pipe interiors and traps. The camera records continuous footage and captures still images to document blockages, cracks, or root intrusion. During the run, the operator notes pipe material, joint condition, and any offset that might cause future problems. Homeowners receive a written report with timestamped footage for repair planning and insurance if needed. This guide to sewer camera inspection finds hidden breaks before they escalate and explains why identifying concealed pipe damage early can help guide the next steps.
For under-slab or behind-wall locations, the camera often follows a sewer or cleanout to reach the problem zone without cutting into finished surfaces. Operators use push rods with distance markers so recorded footage shows how far the camera traveled from the entry point. For more information about warning signs in concealed areas, see our guide on Conway slab leak detection - early signs under floors and walls. That distance helps locate the repair while minimizing demolition and guiding a targeted excavation if required. Video inspection also checks for scale buildup or erosion that weakens pipes over time.
A professional diagnosing a visible defect will combine video findings with pressure gauge readings, smoke tests, or dye tests to confirm active leaks and flow direction. They may run the camera while fixtures are operated to observe leaks under load or to verify intermittent sewer backups. This step-by-step confirmation prevents unnecessary repairs and ensures the chosen fix addresses the real failure.
After confirming the problem, next steps generally include repair options like spot repair, pipe lining, or section replacement depending on the damage. The technician explains expected outcomes, access needs, and how each option affects surrounding materials and finishes. If a repair requires excavation near landscaping or structures, contractors plan for safe access and restoration.
How Electronic Leak Locators Pinpoint Pipe Failures
Electronic leak locators use electrical signals to find faults in pressurized pipes and hidden lines without intrusive digging. Technicians attach a transmitter to an accessible pipe or fitting and run a signal along the line to energize the system. A handheld receiver sweeps above ground to detect signal strength changes that mark breaks, corrosion, or joint failures. Readings are recorded so the crew can mark exact repair points and measure distance from known fixtures.
- Attach transmitter to a cleanout or exposed pipe
- Run the signal while isolating the suspected section
- Sweep with a receiver to map signal losses
- Mark findings with paint or flags for repair crews
- Document readings in a written report
When a professional diagnoses a suspected leak, they combine locator output with observable symptoms like damp spots, reduced pressure, or continuous meter flow. The tech may close shutoff valves and pressurize or depressurize a section while watching the receiver for definitive signal changes. They often follow with a pressure gauge check or dye test to confirm active leakage before recommending repairs. This sequence reduces false positives from nearby metallic utilities or electrical interference.
Electronic locators work on both metallic and nonmetallic pipes when technicians use appropriate sondes or clamp transmitters for plastic lines. For plastic or insulated pipes, a trace wire or sonde provides a detectable signal that a receiver can follow along buried runs. Video footage or moisture meter readings can then target exactly where to open walls or slab for repair.
After pinpointing the failure, professionals prepare a written plan showing repair location, access method, and expected steps to restore the pipe. The report typically includes marked measurements from a reference point, recorded receiver peaks, and any camera footage used to confirm the defect.
Common Causes of Hidden Leaks and Why They Happen
Pipes fail for many reasons including age, corrosion, and freeze damage that weaken joints and pipe walls over time. Tree roots seeking moisture can infiltrate sewer lines at joints and cause cracks or blockages. Mechanical damage from nails, nails, or nearby construction can puncture buried lines without immediate symptoms. Ground movement or settling shifts pipe alignment and stresses connections until a leak develops.
High water pressure and frequent pressure spikes place extra stress on shutoff valves, supply lines, and fittings, causing slow leaks at threaded joints. Chemical corrosion attacks metallic pipes when water chemistry is aggressive or when stray electrical currents speed deterioration. Poor installation practices like inadequate support or misaligned fittings create stress points that fail under normal use. In homes with long runs, unsupported sections can sag and collect debris that wears through the pipe wall.
Clogs and slow drains often precede hidden leaks because backed-up pressure exploits weak spots, especially in traps, cleanouts, or older sewer segments. A technician diagnosing such a case will inspect P-traps, cleanouts, and the sewer camera footage to confirm a breach. They may run a smoke test or dye test while recording pressure gauge readings to locate the active leak. For a homeowner in Myrtle Beach, SC, persistent backups can hide progressive damage that needs timely diagnosis.
Material incompatibility also causes failures when dissimilar metals join without dielectric unions or when plastic fittings are exposed to heat beyond their rating. Thermal cycling around hot-water lines and mixing valves can loosen connections and degrade flapper valves or fill valves over time. In a common situation, a homeowner notices wet carpet and reduced toilet fill, a pro would check the shutoff valve, inspect the wax ring and closet flange, and use a camera or locator to confirm the source.
Early Warning Signs Homeowners Should Watch For
Listen for small, steady sounds like running water behind walls, especially at night when household noise is low and easier to detect. Smells such as a persistent musty odor or sewer scent often mean trapped moisture or slow sewer leaks that need inspection. Notice timing of stains that grow after using appliances, which suggests an active connection to supply or drain lines. If you see recurring stains near baseboards or ceilings, mark their location for a technician to target during testing.
Pay attention to sudden changes in water pressure or toilets that take longer to refill after flushing, which can indicate supply leaks or failing fill valves. Watch your water meter for continuous movement when all fixtures are off to spot hidden flow that proves an active leak exists. Surface warmth or coolness that appears intermittently on floors can point to hot-water line issues or intermittent flow paths under slabs. Photograph any change over a few days to show patterns for the diagnostics report.
Soft or sagging floor areas, spongy drywall, and peeling paint occur when moisture has compromised structural materials and requires prompt verification. A professional will check P-traps, shutoff valves, and the closet flange during an inspection, using moisture meters and targeted camera runs as needed. If you notice frequent clogs paired with bad odors, that combination often leads technicians to perform a video inspection next. For homeowners in Myrtle Beach, SC, documenting these visual cues helps prioritize repairs ahead of humid seasons.
Unusual sounds in appliances like washing machines or dishwashers during operation may signal supply hose leaks or loose fittings that drip when pressurized. Watch landscaping areas for sudden wet spots or lush patches that appear without irrigation, which can reveal buried line leaks under yards. When signs suggest a hidden issue, a plumber will isolate fixtures, run pressure tests, and use acoustic or thermal scans to confirm the source. In Conway, SC, keeping a log of symptoms and when they occur speeds diagnosis and reduces invasive work during repairs.
When to Call a Professional Plumbing Detection Service
If you notice repeated signs from Section 7 that point to an active problem, call a professional promptly. A trained technician can perform diagnostic steps that confirm whether a hidden leak exists or if another system is at fault. They will prioritize safety when structural or mold concerns are present and advise immediate action when needed. Waiting can let water damage spread and increase repair complexity and cost.
- Schedule plumbing inspection & diagnosis with a licensed plumber.
- Describe when and where you first saw symptoms.
- Ask which detection tools they plan to use.
- Request a written diagnostic report after testing.
Professionals use a step-by-step diagnostic workflow to confirm issues before cutting any surfaces. They compare observable cues with sensor readings, run pressure tests, and may insert a camera to verify the defect visually. A clear diagnosis includes recorded footage, moisture meter measurements, and marked repair locations for precise work. Homeowners get a decision-making summary outlining repair options and risks.
Call sooner when you detect continuous meter movement, worsening structural softness, or visible mold growth near plumbing fixtures. If toilets run constantly, fixtures fail to regain pressure, or you smell sewer odors, these signs often justify immediate professional testing.
If the technician confirms a hidden leak, expect options like targeted access, pipe section replacement, or lining depending on location and material. They will explain how each option affects finishes, landscaping, and any permit needs before beginning work. Request a post-repair camera run or moisture check to verify the fix and keep the written report for records.
Preventive Measures to Reduce Future Leak Risks
Start by protecting exposed plumbing components like shutoff valves, supply lines, and visible joints with simple maintenance checks twice yearly. Tighten loose fittings, replace worn supply hoses, and test shutoff valves to ensure they fully stop flow when closed. Use a pressure gauge to confirm home water pressure stays within safe ranges and avoid repeated spikes that stress fittings and fixtures. If you see rust or corrosion on a visible pipe, schedule a professional inspection to prevent hidden deterioration.
Insulate hot-water lines, valves, and exposed pipes to reduce thermal cycling that loosens connections over time and causes small leaks. Add insulation sleeves or wrap pipes in accessible crawlspaces and basements to keep temperatures stable during seasonal swings. Maintain a clear access path to cleanouts, P-traps, and the main shutoff so a technician can test and reach components quickly when needed. For outdoor hose bibs, use insulated covers during colder months to prevent freeze damage.
Adopt monitoring habits like checking your water meter overnight and noting sudden landscaping wet spots to catch slow leaks early before they worsen under slabs. Consider installing a simple leak alarm near water heaters or under sinks to alert you to drips before they become structural problems. When a professional provides a diagnostic report, keep the recorded footage and measurements for future reference to track any recurring issues.
Plan routine professional inspections that include using plumbing leak detection technology such as acoustic scans, thermal imaging, or camera checks to reveal hidden problems before failure. A technician will inspect components like the P-trap, PRV, and sump pump during scheduled maintenance to verify function and spot wear. In a common situation, a homeowner with intermittent slow drainage and odors would have a camera run and pressure check to confirm no developing sewer breach.

 Your Privacy Choices