
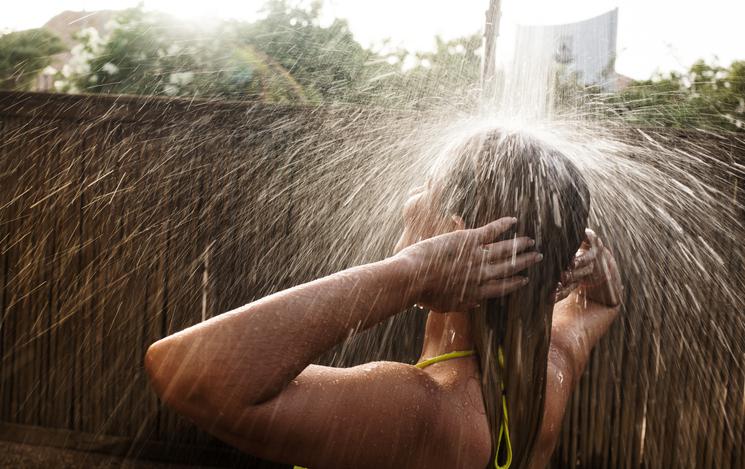
If you have ever fantasized about rinsing off under the open sky after a day at the beach, a long session in the garden, or an afternoon by the pool, installing an outdoor shower might be the perfect addition to your home. An outdoor shower can be both a practical and luxurious feature: a simple rinse station at the low end, a full spa-like retreat at the high end.
But there are several important factors to plan through before you start. Location, plumbing, drainage, materials, winterization, and permits all shape the project scope and cost. Here is what you need to know before taking the plunge.
Choosing the Right Location
The spot you choose for your outdoor shower affects everything downstream: cost, plumbing complexity, drainage options, and how much you actually end up using it. Take these factors into account before settling on a location.
Proximity to existing plumbing. This is the single biggest cost driver. Placing your shower near an existing water line (on the exterior wall closest to a bathroom, laundry room, or kitchen) minimizes the pipe run and keeps installation straightforward. Every additional foot of pipe run between the house and the shower adds labor, materials, and trench depth. A shower in a remote corner of the yard or at the far end of a pool deck may require a much longer supply line and a separate shutoff valve run.
Drainage. The ground beneath and around your shower will receive a significant volume of water regularly. Poor drainage leads to standing water, erosion, mud, mosquito breeding, and, most seriously, water pooling near your home's foundation. Choose a location with a natural slope away from the house, or plan a drainage system from the start.
Privacy. Consider what is visible from neighboring properties, the street, and the rest of your own yard. Mature trees, existing fences, and exterior walls can provide natural screening. Where none exist, a privacy enclosure is part of the build.
Sun exposure. South-facing locations dry faster between uses and help prevent mildew buildup on the enclosure and flooring. Avoid low spots or areas under heavy tree canopy that stay damp.
Distance from septic systems. If your home is on a septic system, avoid installing a shower where drainage water could flow toward the drain field or tank area. Our septic tank care guide covers why additional water volume affecting a septic system is something to plan around carefully.
Types of Outdoor Showers
Understanding the three main types helps clarify the scope of your project before you start making decisions about plumbing and materials.
Cold-water only. The simplest and least expensive option. A cold-water outdoor shower connects to an existing outdoor spigot or a dedicated cold supply line. No hot water line, no mixing valve, no connection to the water heater. These are perfectly comfortable in warm climates and summer months, and they are the most common choice for pool rinse stations and beach houses. Installation is straightforward enough that skilled DIYers sometimes handle the plumbing connection, though a licensed plumber should still run any new buried supply lines.
Hot and cold. Adds a hot water supply line extended from the home's interior plumbing and a mixing valve (ideally a pressure-balance valve to prevent scalding). This option requires a plumber for the interior pipe extension and adds meaningful cost, but delivers a full shower experience usable in cooler weather. The distance from the water heater affects how long hot water takes to arrive. Long pipe runs may benefit from a recirculation pump or a dedicated point-of-use tankless water heater mounted at the shower.
Freestanding or portable. Freestanding outdoor shower panels and portable solar-heated units can be set up without connecting to home plumbing at all. These are ideal for renters, temporary installations, or homeowners who want a low-commitment test before a permanent build. Performance and water temperature options are limited, but the barrier to entry is minimal.
Our outdoor plumbing service handles supply line extensions and connections for both cold-only and hot-and-cold outdoor shower installations.
Plumbing Requirements
Connecting an outdoor shower to your home's plumbing system is not a typical DIY project, and there are several reasons why a licensed plumber should handle this work.
Supply line extension. Running new pipe from the interior of the home to the outdoor location involves identifying the right tap point, routing pipe through the exterior wall, trenching a path to the shower location, and making leak-free connections throughout. PEX tubing is the preferred material for buried supply lines in most climates; it is flexible, freeze-resistant, and durable. Copper Type L works well for exposed above-ground sections in coastal or high-durability applications. Avoid galvanized steel, which corrodes quickly outdoors, particularly near salt air.
Pressure-balance mixing valve. For any hot-and-cold outdoor shower, a pressure-balance valve is strongly recommended. This is the same type of valve used in indoor showers; it prevents sudden temperature swings (and scalding) when other fixtures in the house are used simultaneously. This Old House plumbing expert Richard Trethewey specifically recommends pressure-balance valves for outdoor showers where temperature control is more difficult to manage than indoors.
Backflow prevention. A backflow prevention device must be installed to protect your home's potable water supply from contamination. This is a code requirement in most jurisdictions and a genuine safety measure. Without it, water from outside the home could siphon back into the supply line under certain pressure conditions.
Shutoff valve placement. For homes in cold climates, the shutoff valve for the outdoor shower supply line must be located inside the heated envelope of the home, not inside the outdoor enclosure. This allows you to cut off water to the outdoor line from inside before winter and to fully drain the exposed pipes. Our shut-off valve guide covers where shut-off valves are typically located and how they work.
Water pressure check. Adding an outdoor shower adds a new outlet to your home's supply system. A plumber can confirm that your existing pressure is adequate to support an additional fixture without reducing flow at indoor showers, faucets, or appliances. Our water pressure testing guide covers how pressure is measured and what healthy home pressure looks like.
If your home has high water pressure already, that should be addressed before adding any new fixture, since excess pressure accelerates wear on valves and fittings, particularly outdoor ones exposed to additional temperature extremes.
Drainage Options
Every outdoor shower needs a plan for where the water goes. The right drainage solution depends on your local codes, soil conditions, the volume of water the shower will produce, and whether you are using soap and shampoo.
Ground absorption (simple) works well in areas with permeable soil and low clay content. Water disperses naturally into the ground below and around the shower. This works fine for small volumes and infrequent use, but compacted or clay-heavy soil will pool water quickly.
Gravel bed. A layer of three to four inches of gravel beneath the shower floor dramatically improves drainage in most soil conditions. Water percolates through the gravel and into the soil below at a controlled rate. Slope the gravel bed at a minimum of one-quarter inch per foot away from the house foundation.
Dry well. A dry well is an underground pit, typically two to four feet deep, filled with gravel and lined with landscape fabric. Water drains from the shower, travels to the dry well through a buried pipe, and disperses slowly into the surrounding soil. This is the most common purpose-built drainage solution for outdoor showers. The gravel inside a dry well typically needs replacement every five to six years.
French drain. A French drain is a sloped trench filled with gravel and a perforated pipe that routes water away from the shower area to a better drainage point in the yard. It is a good solution when the immediate ground around the shower has poor permeability.
Connection to home sewer or septic. Connecting the outdoor shower drain directly to the home's drainage system is possible but adds significant cost and complexity. Local codes vary on whether gray water from an outdoor shower can be discharged to the ground at all; some jurisdictions require connection to the sewer if soap products are used. Check your local code before finalizing the drainage plan.
One important caution: always direct drainage away from your home's foundation and basement. Water pooling at the base of the house is a serious risk for water damage and foundation infiltration.
Materials and Fixtures
Outdoor shower components live in a harsh environment: constant water exposure, UV, temperature cycling, and in coastal locations, salt air. Choosing the wrong materials leads to rapid deterioration; choosing the right ones produces a shower that looks good and functions reliably for many years.
Fixtures and Hardware
- Stainless steel (304 grade minimum, 316 for coastal locations): The most corrosion-resistant option. For homes near the ocean where salt air is a factor, 316 marine-grade stainless steel is the appropriate specification. Regular stainless will pit and rust in coastal environments within a few seasons.
- Brass: Durable and corrosion-resistant, develops a natural patina over time. Works well in non-coastal environments.
- Bronze: Excellent durability and develops an attractive natural finish as it weathers. A good choice where aesthetics matter.
- Avoid: Chrome-plated and nickel-plated fixtures. The plating wears off quickly outdoors, leaving the base metal exposed to corrosion.
Flooring
Non-slip flooring is essential. Wet feet on a smooth surface create a significant fall hazard.
- Natural stone (bluestone, travertine, tumbled river rock): Durable and attractive. Choose a textured or tumbled finish, not honed or polished. Professionally installed at $10 to $25 per square foot.
- Composite decking: Low maintenance, drainage-friendly when installed with gaps between boards, and resistant to rot. Around $7 to $12 per square foot.
- Concrete with aggregate finish: Budget-friendly, excellent traction when textured, fully customizable. Around $4 to $8 per square foot.
- River rock: Provides natural drainage beneath the stones and a light massaging effect underfoot.
- Cedar or teak slat platforms: Create a finished look, allow water to drain beneath, and are comfortable underfoot. Require regular sealing to prevent mildew and wood degradation.
Avoid: Smooth ceramic tile, painted surfaces, or untreated standard lumber.
Enclosure
The enclosure provides privacy and defines the visual character of the shower. Common options include:
- Cedar, mahogany, or teak (naturally rot-resistant)
- Pressure-treated lumber for framing
- Composite or PVC panels (low maintenance, weather-resistant)
- Corrugated metal (modern aesthetic, durable)
- Bamboo or natural hedging (informal, blends with landscaping)
- Existing exterior walls or fences (lowest cost, most practical)
If the shower is mounted against your home's exterior wall, use a waterproof membrane behind the enclosure. Exterior siding is not designed for the sustained moisture an outdoor shower produces, and water infiltration at the wall can cause significant structural damage over time.
Winterization in Cold Climates
For any home in a climate that experiences freezing temperatures, winterizing the outdoor shower at the end of each season is not optional; it is essential. Water left in exposed pipes will freeze, expand, and split the pipe. Pipe replacement after a freeze can easily cost thousands of dollars, and structural damage to the enclosure may compound the expense.
The basic winterization process:
- Shut off the interior supply valve that feeds the outdoor shower line.
- Open the shower valve fully to relieve pressure and allow water to drain from the exposed pipes.
- If the pipe runs have any low points where water can pool, use a compressor to blow the lines clear, or use food-grade propylene glycol RV antifreeze in those sections. Do not use automotive or garden hose antifreeze. Ethylene glycol is toxic and can contaminate potable plumbing if backflow occurs.
- Remove and store the showerhead indoors if it is not frost-proof.
- Leave the shower valve in the open position over winter so any residual water can drain freely.
- Ventilate the enclosure rather than sealing it tightly, since trapped moisture inside a wood enclosure promotes mold growth.
The key structural requirement is that the supply shutoff valve is inside the heated living space and that the outdoor pipe run is designed to slope downward toward the shower so it drains completely when the valve is closed. Our winterizing pipes guide covers freeze protection for all outdoor plumbing, including irrigation lines, hose bibs, and supply runs, with the same principles that apply to outdoor showers. Our pipe insulation guide explains which outdoor pipe sections benefit most from insulation in cold climates.
A frost-proof shower valve with a built-in drain-down feature is the cleanest long-term solution: it automatically drains the exposed riser pipe when the valve is closed, eliminating the manual blowout step each fall.
Permits and Regulations
Before any trenching or construction begins, check with your local municipality, building department, and homeowner association (if applicable).
Permits are typically required for:
- Any permanent connection to the home's plumbing system
- Hot water installations
- Structures exceeding a certain height (usually six feet)
- Electrical work for lighting or heating elements
- Connections to the municipal sewer system
Freestanding cold-water units that connect to a hose bib rarely require permits. Permanent plumbing connections almost always do. Skipping permits creates risk at several points: potential fines, complications with homeowner's insurance, and problems during a home sale if unpermitted work is discovered during inspection.
Permit costs typically range from $50 to $200. A licensed plumber handling the installation will typically manage the permitting process as part of the project.
Regular Maintenance
Once installed, an outdoor shower requires consistent but straightforward upkeep:
- Clean fixtures regularly to prevent mineral buildup, which is particularly important in areas with hard water. Our hard water guide explains how to identify the problem and address it at the source.
- Inspect the enclosure for signs of rot, mold, or weathering each spring before the shower comes back into use. Our bathroom mold prevention guide covers the conditions that allow mold to take hold and how to stay ahead of it.
- Check the drain before and after the season for blockages. Leaves, soil, and debris can clog a gravel bed or French drain over time.
- Watch for leaks at supply connections, the mixing valve, and the showerhead. Address them promptly. A slow leak in an outdoor supply line can undermine the surrounding soil and go unnoticed for months. Our 6 ways to find leaks and early warning signs article covers what subtle leak signals look like at outdoor and hidden fixtures.
- Seal wood enclosures annually with an exterior wood preservative to prevent moisture penetration and mildew.
An outdoor shower is a genuinely rewarding home addition when it is planned and built well. With the right location, proper plumbing connections, a solid drainage plan, and climate-appropriate winterization, it can serve the household for decades with minimal trouble.
Planning an outdoor shower? Our licensed plumbers can design the right setup, handle permits, and install it correctly the first time. Call us today or book online to get started. Call us at (800) 259-7705 or book an appointment online. You can also find a location near you.
















 Your Privacy Choices