
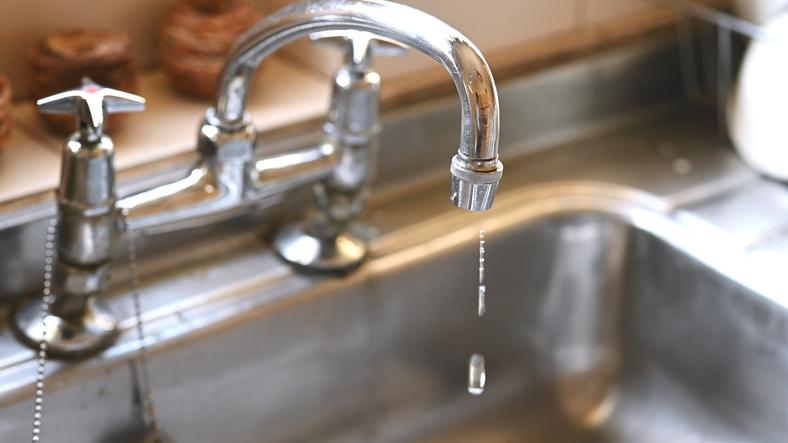
A leaky faucet wastes water and can raise your utility bill. According to the Environmental Protection Agency, a faucet dripping at one drop per second can waste more than 3,000 gallons of water each year. Prompt repair conserves water and can prevent moisture damage around the fixture. This guide explains how to identify common faucet types, make basic repairs, and recognize when to call a plumber.
Understanding the Cause of Your Leaky Faucet
Identifying Your Faucet Type
Before you can fix a leak, identify the faucet’s internal valve type. The four common designs are compression, cartridge, ball, and ceramic disc. Cartridge faucets may have one or two handles, so handle count alone does not identify the valve. Each design uses different parts and requires a different repair approach.
- Compression Faucets: Typically found in older homes, these have separate handles for hot and cold water. Leaks usually stem from worn-out washers or O-rings.
- Cartridge Faucets: Available in both single-handle and two-handle designs, these faucets use a replaceable cartridge to control water flow and, in many models, temperature. A worn cartridge or damaged seal is a common cause of leaks.
- Ball Faucets: These single-handle faucets use a slotted ball to control water flow and temperature. Leaks commonly result from worn O-rings, rubber seats, or springs.
- Ceramic Disc Faucets: These faucets use a ceramic-disc cartridge to control water flow. Leaks may result from worn seals, mineral buildup in accessible passages, or a damaged cartridge.
If you're unsure about your faucet type or would rather skip the guesswork, our faucet repair experts can identify and resolve any issue quickly.
Why Faucets Leak
Understanding the root cause of a leak is essential for effective repair. Common culprits include:
- Worn-out washers or O-rings
- Damaged or corroded valve seats
- Improper installation
- Mineral buildup or corrosion
- Loose parts from regular use
- High water pressure that places constant strain on internal components
With a double-handle faucet, you can often identify the leaking side by closing the hot and cold shut-off valves under the sink one at a time while the faucet drips. If closing one valve stops the drip, that side likely needs repair. Stop and call a plumber if a valve is stuck, leaks while being operated, or does not fully stop the water. If the test is inconclusive, plan to inspect both sides.
Preparing for the Repair
Tools and Materials Needed
Gather these essentials before you begin:
- Adjustable wrench
- Screwdriver (flathead and Phillips)
- Needle-nose pliers
- Replacement parts (washers, O-rings, cartridge, or springs as needed)
- Plumber’s grease labeled for potable-water faucet seals and compatible with the replacement part
- PTFE thread-seal tape, only if the faucet manufacturer’s instructions call for it on a threaded connection
- White vinegar for cleaning mineral deposits
- A cloth or towel and a small bucket
Initial Steps
Before you start any disassembly, take these steps:
- Turn off the hot and cold water supply valves under the sink by turning them clockwise until closed. Open the faucet to confirm that the flow has stopped, release pressure, and drain residual water. If either valve is stuck, leaks, or does not shut off the water completely, stop and use the home’s main shutoff only if you know where it is and can operate it safely; otherwise, call a plumber.
- Cover the drain with a stopper or rag to prevent small parts from falling in.
- Place a towel in the sink basin to protect the surface and catch dropped components.
- Take photos of the faucet assembly from multiple angles before disassembly. These reference images are invaluable during reassembly.
Step-by-Step Repairs by Faucet Type
While the general repair process is similar across faucet types, the specific parts and steps differ enough that knowing your faucet type makes a real difference. Here is how to approach each one.
Compression Faucets
Compression faucets are common in many older homes and often drip when their rubber washers wear out.
- Remove the decorative cap on the handle, then unscrew the handle screw and pull the handle off.
- Use an adjustable wrench to loosen and remove the packing nut beneath the handle.
- Pull out the stem. At the bottom, locate the rubber seat washer held in place by a screw. If the washer is worn, cracked, hardened, or misshapen, replace it with the same size and apply a light coating of compatible plumber’s grease if the manufacturer recommends it.
- Inspect the O-ring on the stem as well. If it appears cracked, misshapen, or stiff, replace it.
- Check the valve seat inside the faucet body for visible corrosion or roughness. If the seat is pitted, it can wear through new washers quickly. A plumber can resurface or replace a damaged seat if needed.
- Reassemble in reverse order. Avoid overtightening the packing nut, as this can damage threads and make the handle stiff to turn.
Cartridge Faucets
Cartridge faucets are common in both kitchens and bathrooms and are generally straightforward to repair once you locate the right replacement cartridge.
- Remove the decorative cap and unscrew the handle. Pull the handle off or tilt it back to remove it.
- If a retaining clip or nut secures the cartridge, remove it using needle-nose pliers.
- Pull the cartridge straight up and out of the valve body. Note its orientation before removing it, as it must go back in the same way.
- Bring the old cartridge to the hardware store to match it exactly, or note the faucet brand and model to find the correct replacement.
- Inspect and replace any O-rings on the cartridge body before installing the new one.
- Insert the new cartridge in the same orientation as the old one, replace the retaining clip or nut, and reassemble the handle.
Ball Faucets
Ball faucets are most common in kitchen sinks and have more parts than other types, so consider purchasing a repair kit specific to your faucet brand that includes all the components you may need.
- Remove the handle set screw and pull off the handle. Remove the cap and collar beneath it.
- Use an adjustable wrench to loosen and remove the dome-shaped cam assembly, then lift out the rotating ball. Note the position of any slots or tabs.
- Use a small screwdriver or the tool recommended by the manufacturer to remove the rubber seats and springs. Replace parts that are worn, hardened, cracked, or included in the repair kit specified for your faucet model.
- Inspect the ball itself for deep scratches or wear. Light marks are acceptable, but significant damage means the ball should be replaced.
- Inspect the O-rings on the faucet body and replace any that are worn, cracked, or misshapen. Apply a light coating of grease labeled for potable-water faucet seals if the manufacturer recommends it.
- Reassemble in reverse order, ensuring the ball is seated correctly with any slots aligned to their guides. Avoid overtightening the collar.
Ceramic Disc Faucets
Ceramic disc faucets are designed for long service, but leaks can develop when seals wear, mineral deposits restrict accessible passages, or the cartridge is damaged. Because designs vary, follow the faucet manufacturer’s instructions when inspecting, cleaning, or replacing the cartridge.
- Remove the handle and set it aside. Inside, you'll find a cylindrical cartridge secured by screws.
- Unscrew and remove the cylinder from the faucet body.
- Inspect the ceramic discs on the bottom of the cylinder for cracks or damage. If cracked, the cylinder will need to be replaced entirely.
- If the ceramic cartridge appears intact, follow the manufacturer’s cleaning instructions. Remove mineral deposits from accessible nonceramic parts with white vinegar and a soft brush, but do not scrape, sand, or force the ceramic surfaces.
- Replace the neoprene seals on the underside of the cylinder if they show wear.
- Reassemble the cylinder, apply the screws snugly, and reinstall the handle.
General Reassembly and Testing
For all faucet types, reassemble in reverse order of how you disassembled:
- Apply a light coating of grease labeled for potable-water faucet seals to new O-rings or washers only when the faucet or replacement-part manufacturer recommends it.
- Reinstall the stem, cartridge, or cylinder, ensuring proper alignment.
- Tighten the packing nut or retaining hardware firmly but not excessively.
- Replace handles and decorative caps.
- Turn the water supply back on slowly while watching the repaired area and the cabinet below for leaks. Operate the faucet through hot and cold positions, then shut it off and check the spout, base, handles, supply connections, and cabinet again. If water appears at a connection or the drip continues, turn the supply off and recheck the assembly or call a plumber.
Preventing Future Leaks
Routine Maintenance Tips
A few simple habits extend the life of your faucets considerably:
- Clean aerators regularly to prevent mineral buildup that can affect water flow and put stress on internal components.
- Avoid overtightening handles, which can damage washers, O-rings, and valve seats over time.
- Inspect visible parts of your faucets periodically for early signs of wear, corrosion, or moisture around the base.
- Address high water pressure promptly. If your faucets wear out quickly or you notice frequent drips across multiple fixtures, high home water pressure could be the underlying cause.
- If an older compression faucet requires frequent repairs, compare the cost and parts availability of continued repair with replacement by a modern faucet.
For more tips on identifying early warning signs of plumbing problems, see our guide to common household plumbing leaks.
When to Call a Professional Plumber
While many faucet repairs are genuinely DIY-friendly, some situations call for expert help. Contact a licensed plumber if:
- The leak persists after your repair attempt.
- You encounter an unusually complex faucet design or a leak coming from inside the wall.
- There is significant corrosion or damage to the faucet body itself.
- You discover water damage, staining, or mold around the sink cabinet, which may indicate a hidden plumbing leak requiring professional detection.
- You're not comfortable disassembling plumbing fixtures or lack the right tools for the job.
If the leak is difficult to diagnose or the repair is beyond your comfort level, Benjamin Franklin Plumbing can inspect the faucet, identify the cause, and recommend repair or replacement. Prompt attention can help prevent wasted water and damage around the fixture. Contact us for professional faucet repair.
Call your local Benjamin Franklin Plumbing location or book an appointment online.
















 Your Privacy Choices