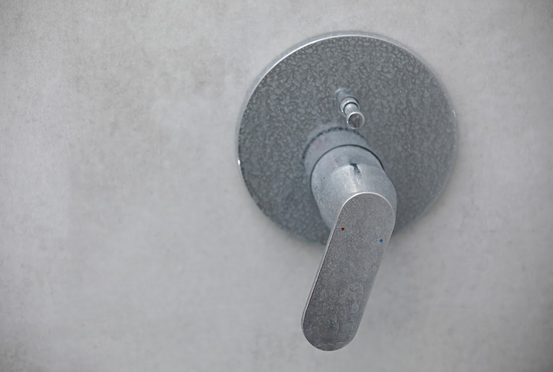
“Why is my faucet handle hard to turn?” or "Why is my shower handle hard to turn?" – are frustrating but common questions. Because your faucets are more prone to mineral buildup, it’s not all that uncommon for that buildup to cause a little friction inside the handle. Fortunately, this isn’t usually cause for alarm and can be fixed with a little cleaning and a little wiggling.
Follow these tips for how to loosen a faucet handle that’s stuck.
What Causes a Stiff, Tight or Stuck Faucet Handle?
Some of the most common reasons why your faucet handle keeps getting stuck include:
- Mineral buildup
- Corrosion
- Faulty cartridge
- Worn-out gaskets or O-rings
Related Content: Removing and Preventing Limescale
How to Fix a Stuck Faucet Handle on Your Sink or Shower
If your faucet handle is hard to turn, it’s likely the result of limescale buildup and requires a little cleaning and adjustment. Try these steps first:
- Remove corrosion and buildup. Depending on the type of faucet handle, you might be able to use a cloth or brush and a simple solution of water and vinegar to remove corrosion around the exterior, base, and dome of the handle. Use the cloth or brush to get into the crevices and let the vinegar soak in for a few minutes. If this doesn’t work, you may need to remove the handle fully, then soak and clean it.
- Lubricate your faucet handle. If cleaning doesn’t work, you can try using a penetrating oil like WD-40 around the perimeter and any exposed crevices of the handle to loosen it. Let the oil sit for a moment before trying to wiggle it free. Like the previous step though, you may need to remove the handle and spray the oil inside the valve.
- Loosen it with a wrench. If cleaning or oiling the faucet isn’t working, you may just need to apply more force. Tighten a wrench around the base of the handle, and gently turn it. (To prevent scratches, wrap a cloth around the handle before applying the wrench). Hopefully, the vinegar and oil will make this adjustment easier by dissolving buildup and lubricating the moving parts.
How To Remove a Stuck Faucet Handle
If your faucet handle won’t turn at all, it could be the result of a worn-out or broken part. You’ll want to remove it first to inspect. To remove it:
- Shut off the sink’s water supply.
- Cover and close the drain to prevent losing any parts.
- If there’s a visible or hidden set screw (a fully threaded screw with no head) on the faucet handle, remove it.
- If there’s no visible screw, you may need to hold the handle in place while using a wrench to unscrew the base of the handle.
- Pull up the faucet handle and look inside for visible signs of mineral buildup. Soak and clean the handle in vinegar, then use a brush to remove any excess buildup.
- Before putting the handle back on, check the cartridge and O-rings for visible signs of wear. Repeat the same cleaning and soaking method in step 5. If you notice any damage such as metal shavings or split O-rings, consider replacing them.
- Apply a small amount of oil (WD-40, or similar penetrating oil) around the O-rings and put them back in place.
- Reassemble the faucet handle and turn the water back on.
- Check to see that the faucet handle is now moving properly. Turn it on and off a few times to loosen any remaining mineral buildup and allow the oil to circulate.
If you still can’t remove the faucet handle, it probably needs to be replaced. Call your local Benjamin Franklin Plumbing for faucet replacement.
Related Content: Faucets Are the Next Wave in Smart Technology
Broken Faucet Handle? Call Benjamin Franklin Plumbing
If, despite your efforts, your faucet handle is still giving your trouble, it’s likely in need of repair or replacement. Count on our licensed professionals at Benjamin Franklin Plumbing for more extensive faucet services. We’ll repair it, or provide you with a better replacement solution! Call us at 1-877-BEN-1776 or book an appointment online.


 Your Privacy Choices