
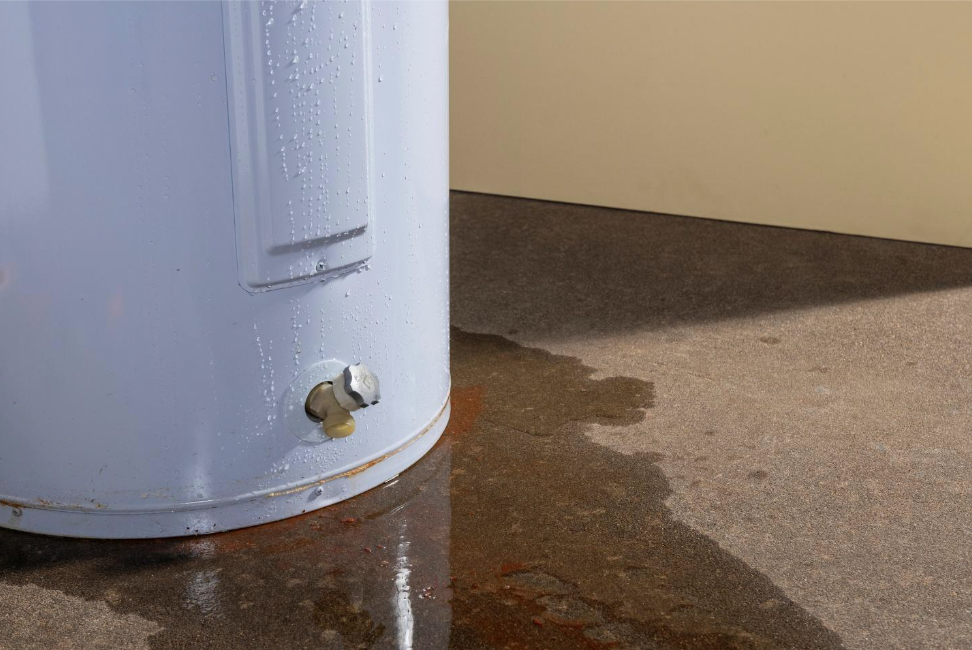
Key Takeaways About Water Heater Keep Breaking
This topic explains why a water heater keeps failing and what usually causes repeated breakdowns. It is for homeowners and property managers who see recurring problems and need to know when to act.
- Identify aging components that lose function over years of cycles.
- Prevent sediment buildup by scheduling regular tank flushing service.
- Avoid corrosion by checking anode rods and fittings periodically.
- Spot pressure issues using a gauge and testing the T&P valve.
- Reduce control failures by testing thermostats and electrical connections.
- Plan replacement when repairs accumulate or the tank shows thinning.
Introduction
When a water heater keeps breaking, homeowners face cold showers, higher energy bills, and sudden repair calls. Repeated failures usually point to underlying issues like aging parts, sediment buildup, or corrosion. Ignoring those signs often leads to more expensive damage in walls or floors. For people managing rental properties, recurring heater trouble adds stress and unexpected downtime.
Age matters because tanks and internal components wear down over years of heating and cooling cycles. Mineral deposits collect on the tank bottom and heating elements, reducing efficiency and causing overheating. Corrosion can thin the tank metal and attack fittings, leading to leaks that start small and grow fast. These problems show up differently depending on how the system was installed and maintained.
High water pressure and thermal expansion also make systems fail more often than they should. Pressure that sits above recommended levels stresses valves, nipples, and the tank seam until a component gives. Faulty controls, like thermostats or the gas valve, create repeated short cycling or no heat at all. Burn marks, hissing noises, or frequent trips on the breaker are clues that electrical or gas controls need inspection.
Homeowners in Myrtle Beach, SC and property managers in Conway, SC should take recurring heater problems seriously before water damage starts. A professional can inspect the tank, anode rod, pressure relief valve, and supply connections to find root causes. They can also provide a written report and recommend repair or replacement based on observed deterioration. Acting on recurring symptoms prevents emergencies and helps plan a safe, budgeted fix.
Aging Components: Why It Happens and When to Replace
Aging components refer to worn parts inside a water heater that fail after years of thermal cycles and corrosion. Metal weakens, seals harden, and electrical or gas controls lose calibration over time. Homeowners often ask, "How long should a water heater last?" and the simple answer is that tanks commonly last 8–15 years depending on use and maintenance. If your water heater keep breaking frequently, age is a top suspect to investigate promptly.
- Anode rod wears down and stops protecting the tank.
- Heating elements develop hot spots and burn out.
- Thermostats drift and cause short cycling.
- Seals and gaskets become brittle and leak.
Visible signs point to aging parts before full failure occurs, like rusty water, frequent pilot outages, or slow reheating. A professional will inspect the anode rod, test heating elements for continuity, and check thermostat and gas valve operation. They will also measure voltage at the element and perform a pressure relief valve manual test to confirm function. These checks help separate component failure from other causes like sediment or pressure.
Replacement decisions weigh cost, age, and condition of key parts versus tank integrity and efficiency. If the anode is nearly gone but the tank metal looks solid, replacing the rod can extend life for a few years. When the tank shows thinning, multiple fittings leak, or repairs stack up, replacement usually makes more sense. Homeowners should factor local water hardness and repair access when choosing repairs versus replacement.
In rental properties in Conway, SC frequent failures increase liability and tenant disruption, so managers should track service history and set replacement triggers. A typical trigger is two distinct major repairs within three years or when the unit exceeds its expected service life. Documenting inspections, test readings, and repair receipts helps professionals make a clear recommendation. When safety risks or repeated breakdowns appear, contact a licensed plumber in Myrtle Beach for a written evaluation and next steps.
Sediment Buildup Mechanics and When to Flush Tank
Sediment settles in the bottom of a tank when hard water carries minerals that drop out during heating cycles. Over time, this layer reduces effective tank volume and covers lower heating elements, forcing them to run hotter and fail sooner. Homeowners may notice rumbling noises as trapped steam pockets move through sediment and strain the tank metal. A professional can inspect by measuring tank temperature stratification and checking element condition during a service call.
Flushing removes loose mineral deposits before they harden into compacted layers that insulate the water from heat transfer surfaces. Technicians use a garden hose at the drain valve while the heater is cool or following manufacturer instructions to avoid scalding and pressure issues. If flushing yields sand-like material or large amounts of grit, the heater likely needs more frequent maintenance or a change in strategy.
When sediment has baked onto elements or filled the tank bottom, simple flushing may not restore efficiency or stop failures. A plumber will remove and test heating elements for continuity and check for hot spots with a visual inspection and voltage reading. They may recommend element replacement, a thorough power-flush, or, if the bottom shows pitting, tank replacement to avoid future leaks.
Deciding when to flush depends on water hardness, usage, and symptoms like slow recovery, noises, or tripped elements that suggest overheating. Regular annual flushing suits many homes, while very hard-water situations need semiannual attention or an added water-softening solution. If you notice repeated element failures or persistent sediment after flushing, schedule a professional diagnostic that includes pressure gauge checks and written test results. For guidance on service options and scheduling, see the page about our water heater services.
Corrosion Processes: How It Works and When to Repair
Corrosion begins when metal reacts with oxygen and water, creating rust that thins the tank and fittings over time. Galvanic corrosion can occur where dissimilar metals meet, like copper piping attached directly to steel tank nipples. A visible clue is flaky rust around connections or rusty water that appears intermittently from hot taps. If you see those signs, a technician will inspect the tank exterior, fittings, and accessible internal parts for metal loss.
Technicians check anode rod condition because it sacrifices itself to protect the tank lining from corrosion and slows tank failure. They remove the anode, compare its remaining length and mass, and report if replacement can meaningfully extend service life. Professionals may also use a moisture meter around seams and fittings to detect hidden leaks before a visible failure starts. In Conway, SC, repeated anode depletion often signals a need for a scheduled replacement policy.
Internal corrosion wears heating elements and creates pitting that collects sediment and accelerates leaks when the tank thins at the bottom. A technician will perform a pressure test and inspect the sacrificial anode, dip tube, and lower tank for pitting or perforation. They may also take water samples if aggressive water chemistry is suspected and recommend water-treatment options. In some cases, localized repair on fittings or replacing valves and nipples solves the problem temporarily.
When corrosion reaches the tank shell or multiple fittings show deterioration, repair becomes risky and replacement is the safer option to prevent sudden flooding. A professional decision relies on measured wall thickness, leak history, and the cost versus expected life of a new unit. For homeowners in Myrtle Beach, SC, environmental factors and access to service influence the repair-versus-replace choice. If corrosion recurs after repairs, schedule a full evaluation and consider upgrading to a newer, corrosion-resistant design.
High Water Pressure Effects and When to Adjust
High steady water pressure forces strain on tank seams, valves, and supply fittings and can shorten component life significantly. Pressure above recommended levels makes the temperature and pressure relief valve cycle more often and may stress threads and connectors. Homeowners often hear hissing or notice small, repeated drips at joints when pressure is the root cause. A pressure gauge reading at an outside hose bib helps confirm if system pressure exceeds acceptable levels.
- Check pressure with a gauge at an exterior spigot.
- Inspect the pressure-reducing valve for correct setpoint.
- Look for damp spots near fittings and valves.
- Monitor the T&P valve for frequent discharge.
Thermal expansion from heating closed-system water raises pressure inside the tank and the plumbing loop, worsening wear on seals and valves. A professional will perform a static pressure test and a thermal expansion assessment using a pressure gauge and visual inspection. They will also check for a functioning expansion tank and measure its air charge with a tire gauge if present. If the expansion tank is waterlogged, it cannot absorb pressure spikes and requires service or replacement.
Adjusting household pressure usually involves tuning a pressure-reducing valve or adding an expansion tank to control peaks and protect the heater. A plumber will set the PRV to a safe operating pressure, typically between thirty and sixty psi, and verify with a gauge under typical use conditions. If repeated leaks or valve failures continue despite adjustments, the technician documents readings and recommends repair or replacement based on observed pressures and component condition.
Faulty Thermostat: How It Works and When to Replace
A faulty thermostat can cause repeated short cycling or no heat, even when other parts appear sound. Thermostats control when elements or gas valves turn on, and a misreading can force constant restarting. Homeowners may notice rapid temperature swings, frequent breaker trips, or unusually cool water after the heater runs. A professional will verify thermostat output with a voltage reading and compare temperature at the element or burner to the setpoint.
Technicians inspect wiring connections, check continuity, and measure temperature differential across the thermostat using a multimeter and infrared spot check. They also test element resistance and gas valve response to separate thermostat failure from electrical or gas issues. If the thermostat shows erratic readings or fails to command the element consistently, replacement is usually the simplest fix. In rental units in Conway, SC repeated control failures warrant tracking replacement dates to avoid tenant disruption.
Older mechanical thermostats drift with age and can fail more often in units that keep breaking frequently, especially under heavy cycling conditions. Replacing a thermostat involves matching temperature range and terminal configuration and confirming calibration after installation. A technician will insulate sensor wells, set the correct temperature, and record post-replacement voltage and temperature readings for documentation.
Deciding whether to replace the thermostat depends on frequency of failures and concurrent component issues like damaged elements or control boards. If replacement improves operation but failures return, a full electrical diagnostic should follow to check for voltage fluctuations or loose neutral connections. Professionals provide a written report showing measured voltages, continuity tests, and observed symptoms to guide next steps. When safety risks or repeating control faults arise, contact a licensed plumber or electrician to perform the replacement and confirm safe operation.
Ignored Maintenance Consequences and When to Schedule Service
Skipping regular maintenance often lets small leaks and failing parts worsen until they affect surrounding structure and appliances. Hidden slow leaks can soak wall studs and floor underlay before becoming visible, increasing repair scope and cost. A technician uses a moisture meter and visual inspection around fittings to detect these developing issues early. If you notice damp flooring or musty smells near plumbing, schedule service before damage spreads further.
Failing to replace sacrificial parts on schedule accelerates internal wear and can cause sudden tank breaches that flood a home. Professionals inspect the anode rod and check dip tube condition during a service visit to assess remaining protective life. They also perform a pressure test and document readings to show whether continued operation is safe. When documentation shows declining protective function, a scheduled replacement prevents emergency failures.
Postponing routine flushing and valve tests raises the chance of component overheating and repeated element burnout, leading to short cycling and electrical stress. For homeowners with on-demand systems, our guide on how to prevent tankless water heater scale buildup covers another maintenance concern that can affect water heater performance. A plumber removes scale from elements and exercises the temperature-pressure relief valve to confirm it opens and reseats properly. They may record continuity and voltage readings to determine whether repeated electrical faults point to wiring or control issues. If tests show recurring electrical stress, arrange a full diagnostic to protect the system and home.
Property managers and homeowners with repeated failures should measure how often a unit needs attention to decide between continued repairs or replacement planning in Myrtle Beach, SC. For rental accounts in Conway, SC tracking repair frequency helps set maintenance intervals and replacement triggers to reduce tenant disruption. A professional provides a written service report with observed symptoms, test readings, and recommended timing for the next action. Use that report to schedule water heater repair or replacement before failures become emergencies.
Frequent Leaks: Why It Happens and When to Call a Professional
Frequent leaks often start at fittings, valves, or weak weld seams that suffer repetitive stress from thermal cycles and pressure changes. Visible damp spots, puddles under the tank, or a steady drip from pipe joints are clear homeowner cues to act. A technician will trace leaks, isolate the water source, and pressurize the system to confirm the leak location. If you smell mildew or see bubbling paint near the heater, schedule a professional inspection promptly to limit hidden damage.
- Check visible pipe connections for corrosion.
- Listen for steady dripping or hissing near valves.
- Inspect the temperature-pressure valve for discharge signs.
- Look for wet insulation or pooling on the floor.
When a plumber diagnoses a recurring leak, they use a pressure gauge and dye tests to confirm leak pathways and measure loss rate. They may remove insulation or fittings to inspect threads and sealing surfaces for cracks or corrosion. Technicians also test the T&P valve operation and measure static pressure to determine if pressure spikes cause repeat failures. If hidden tank perforation appears likely, they recommend a replacement rather than patching a compromised shell.
Repair decisions weigh leak source, component condition, and the rate at which water escapes during testing and observation. Small pinhole leaks at the tank shell usually mean imminent failure and warrant replacement for safety and property protection. For leaking fittings or valves, replacing nipples, unions, and the T&P valve often restores service when the tank metal remains solid. Homeowners in Myrtle Beach, SC, and in Conway, SC should keep repair records and test readings to support a professional replacement recommendation when leaks recur.
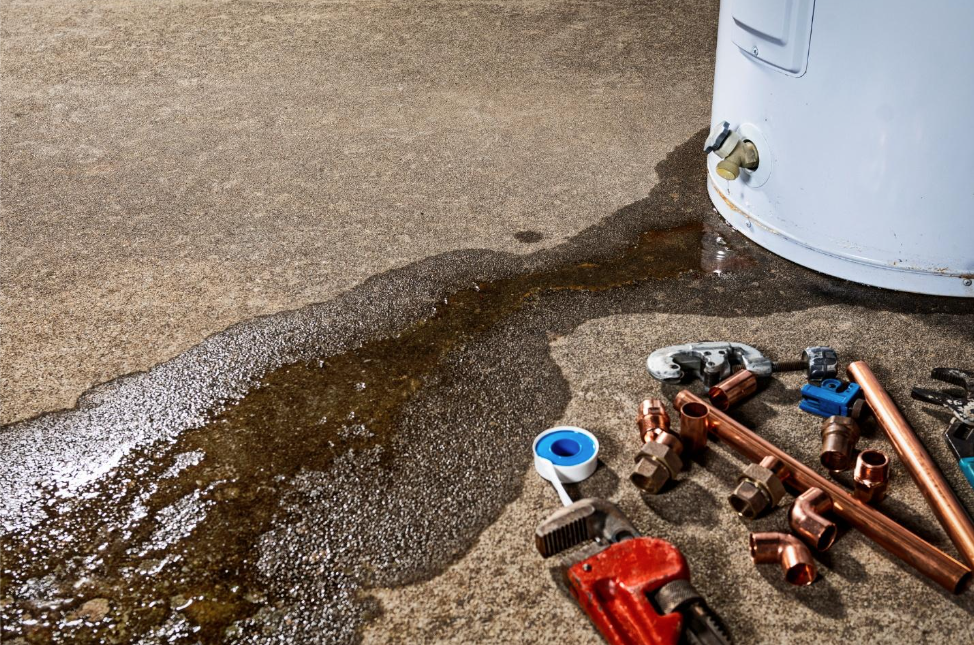
Photo from iStock - Credit: cmannphoto
Recurrent Failures Prevention Steps and When to Upgrade
Start prevention by keeping a clear record of every repair, including dates, parts replaced, and measured readings during service. A technician uses written test results to spot patterns that predict failure and recommend targeted upgrades. Tracking helps determine if repeated parts failures stem from installation, water chemistry, or unit age rather than isolated incidents. For rental properties this record guides replacement timing to reduce tenant disruption and liability.
Install protective hardware that reduces stress on the heater when the root cause is mechanical rather than tank failure. Examples include a correctly sized pressure-reducing valve, an expansion tank with verified air charge, and a serviceable isolation valve near the heater. A plumber will confirm pipe alignment and add flexible connectors to remove rigid stress on nipples and joints. These measures lower the chance that a water heater keep breaking due to mechanical strain.
When plumbing tests show persistent internal deterioration, plan an upgrade to a newer model that matches household demand and offers modern protections. During an upgrade consultation, a professional compares measured flow rates, recovery needs, and electrical or gas supply capacity. They will also inspect venting, combustion air, and the electrical circuit to ensure the new unit operates safely and efficiently. For homeowners in Myrtle Beach, SC this step prevents repeated emergency calls during high-use seasons.
For property managers, set replacement thresholds based on documented failures and repair frequency to avoid repeated disruptions in Conway, SC rental units. A practical trigger is replacing a unit after multiple major component failures within a short window or when inspections show tank wall thinning. Professionals will perform a final diagnostic including pressure tests, anode inspection, and element continuity checks to confirm recommendation. Scheduling the upgrade at a planned time reduces tenant impact and allows orderly disposal of the old unit.

 Your Privacy Choices