
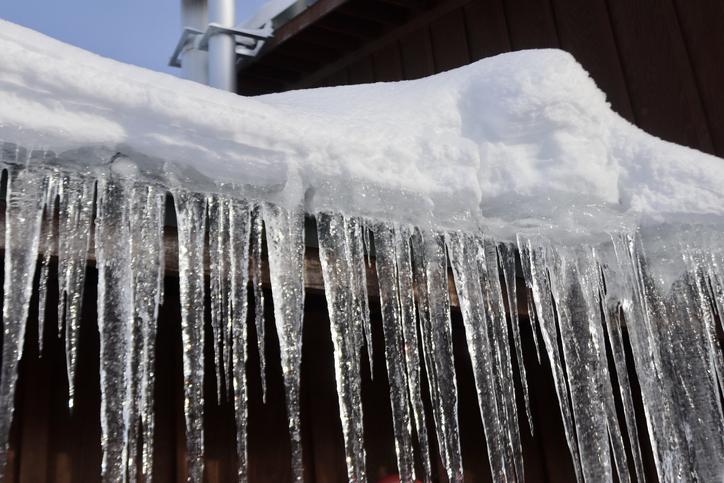
Every part of the country can be susceptible to frozen pipes when temperatures drop below 32°F, especially during extended cold spells. This is true regardless of pipe material. Copper, steel, stainless steel, PVC, PEX, galvanized, and more are all vulnerable.
When water inside a pipe freezes, it expands with tremendous force. That expansion builds pressure against whatever is blocking it, and if the pressure exceeds what the pipe can handle, the pipe bursts. A burst pipe can release up to 8 gallons of water per minute into your home before you can shut off the supply, leading to serious water damage recovery costs that your homeowners insurance may not cover if the freeze was considered preventable.
The good news is that a frozen pipe that hasn't yet burst can often be thawed safely at home. Follow these steps carefully to resolve the issue without making it worse.
Signs of a Frozen Pipe
Before you start thawing, confirm that a frozen pipe is actually the problem. Common signs include:
- Little to no water coming out of a faucet or showerhead.
- Gurgling sounds from pipes or drains.
- Unusual odors coming up from drains can indicate a blocked vent or drain line.
- Visible frost, condensation, or slight bulging along exposed pipe runs.
Even if you don't notice these symptoms during a cold snap, it is worth inspecting exposed pipes in unheated areas, such as the basement, attic, crawl space, and garage, whenever temperatures drop below 20°F for an extended period. Pipes in these locations and along exterior walls are at the highest risk of freezing.
Before You Start: What to Have Ready
Gather your supplies before beginning. You will need one of the following heat sources:
- a hair dryer
- an electric heating pad
- or towels soaked in hot water.
You may also want
- a flashlight to inspect the pipe
- buckets and towels to catch any water that drips or leaks
- an extension cord if the frozen pipe is far from an outlet.
Make sure any electrical equipment stays away from standing water and visible drips throughout the process.
Step-by-Step: How to Thaw an Accessible Frozen Pipe
Step 1: Find the Frozen Section
Turn on the faucets in your home one at a time. When a faucet produces only a trickle or nothing at all, the supply line feeding that fixture is likely frozen. Follow the pipe back from that fixture toward its likely cold exposure point: an exterior wall, an unheated space, or an area where the pipe passes near a vent or drafty opening.
Check exposed piping in basements, crawl spaces, attics, and garages first. Use a flashlight to look for visible frost, condensation, or any slight bulging along the pipe's surface. A bulge is a serious warning sign that the pipe wall has already been stressed by ice pressure and may be on the verge of cracking.
Step 2: Shut Off the Main Water Supply
Before applying any heat, shut off the main water supply to the home. If a thawing pipe cracks or bursts during the process, cutting off the supply first limits the volume of water that can escape. Our guide to locating your shut-off valves covers exactly where to look and how to operate both ball valves and gate valves.
Step 3: Open the Affected Faucet
Open both the hot and cold handles of the faucet connected to the frozen line. This does two things. It relieves pressure that has built up in the line, and it gives melting water and any steam a place to escape as you apply heat. Watching the faucet is also your best way to monitor progress. As ice melts and flow returns, you will see a drip turn into a trickle and eventually a steady stream.
Step 4: Apply Heat Starting at the Faucet End
This step is where technique matters most. Always start applying heat at the faucet end of the frozen section and work your way toward the frozen blockage, not the other way around. Starting at the faucet end allows melting water to drain out freely as ice releases. If you start at the far end of the ice blockage, melting water becomes trapped between the heat source and the still-frozen section, which can build pressure and cause a burst.
Hair dryer: This is the safest and most controllable method for accessible pipes. Set the dryer to low or medium heat and sweep it back and forth steadily along the pipe rather than holding it in one spot. Keep the dryer moving throughout. If the pipe is far from an outlet, use an extension cord, but keep it clear of any water that may drip from the thawing pipe.
Electric heating pad: Wrap a heating pad set to medium around the frozen section. This provides consistent, even heat and is especially useful for pipes in tight spaces where a hair dryer is hard to maneuver. A heating pad with an automatic shutoff is ideal since it prevents overheating if you need to step away briefly.
Hot towels: Soak towels in hot (not boiling) water, wring them out, and wrap them around the frozen section. This is slower but very safe, and particularly appropriate for plastic pipes where overheating is a greater concern. Replace the towels every 15 to 20 minutes as they cool.
Electric space heater: A portable electric space heater can be positioned to warm the surrounding air in a confined space, which helps thaw the pipe more gradually. Place it well away from any flammable materials and do not leave it unattended.
Step 5: Continue Until Full Pressure Is Restored
Keep applying heat steadily. Depending on the pipe size, how much of the pipe is frozen, and the ambient temperature in the space, thawing can take anywhere from 30 minutes to several hours. Do not stop once you see the first trickle. Continue until full water pressure has returned to that fixture. Once pressure is fully restored, let the faucet run for several minutes and inspect the pipe closely for any drips, cracks, or wet spots that could indicate a slow leak that developed under the ice pressure.
If leaking pipes are discovered after thawing, shut the water off again immediately and call a plumber. A pipe that has been stressed by freezing may develop a hairline crack that is not immediately visible but will worsen over time.
How to Thaw Enclosed Pipes Behind Walls
If the frozen pipe is behind drywall and you cannot access it directly, a few approaches can still help.
Raise your thermostat. Depending on how much ice has formed, simply increasing your home's temperature by several degrees may be enough to thaw the pipe gradually. This method requires patience and can take many hours or even a full day, but it is safe and requires no special equipment.
Use an infrared lamp. Position an infrared lamp about two feet in front of the wall section where you believe the frozen pipe is located. Do not leave the lamp unattended. The radiant heat penetrates the wall surface and warms the pipe inside.
Open adjacent cabinet doors. If the frozen pipe is behind a kitchen or bathroom cabinet on an exterior wall, opening the cabinet doors allows warm household air to circulate directly around the cabinet's back panel, reaching the pipe indirectly.
If none of these methods restore flow, or if you are not confident in the pipe's location, contact a licensed plumber. Our emergency plumbing team has thermal imaging tools that can precisely locate the frozen section through walls without any guesswork.
What NOT to Do When Thawing Frozen Pipes
Several thawing methods are dangerous and should never be used, regardless of how desperate the situation feels.
Never use an open flame. A propane torch, blowtorch, or any open-flame device is a fire hazard and can rapidly overheat a pipe, damaging or melting the pipe wall, igniting nearby framing or insulation, and creating toxic fumes in enclosed spaces.
Never use a gas-powered space heater indoors. Gas-powered heaters produce carbon monoxide, which is odorless, colorless, and potentially fatal in enclosed spaces like crawl spaces and basements.
Never use boiling water. Pouring boiling water on a frozen pipe creates rapid and uneven heating that can crack the pipe wall. Use hot but not boiling water if towels are your method.
Never use a high-temperature heat gun at close range. Concentrated industrial heat can melt plastic pipes and char copper fittings in seconds.
Never ignore a bulging or cracked pipe. If the pipe shows visible deformation before thawing, call a professional. The structural integrity has already been compromised. If it bursts while you are working on it, the water release will be significant. Our leak detection team can assess suspect pipes before thawing begins.
What to Do If a Pipe Bursts
If a pipe bursts while you are attempting to thaw it, shut off the main water supply immediately. Every second the supply stays on means more water entering the home. Then call your local Benjamin Franklin Plumbing for pipe repair right away. While you wait, place buckets and towels to contain the water and move furniture, rugs, and valuables away from the wet area.
One important note: homeowners insurance typically covers water damage from a sudden and accidental burst pipe. However, if the insurer determines the damage resulted from pipes that were not reasonably protected from freezing, coverage can be denied. Our article on freeze damage coverage explains exactly what insurers look for and how to protect yourself.
How to Prevent Your Pipes from Freezing
Even with the safest thawing methods, burst pipes are still possible. The better strategy is prevention.
Winterizing pipes before the cold season arrives is the most effective single step you can take. Disconnect and drain outdoor hoses, shut off outdoor faucets at their interior supply valve, and drain sprinkler systems before the first freeze.
Keep your thermostat above 55°F at all times during winter, even when you travel. A consistent indoor temperature prevents the kind of sudden temperature drop that catches pipes unprepared.
Install pipe insulation on exposed runs in unheated areas. Foam pipe sleeves are inexpensive, cut to length easily, and dramatically slow heat loss from pipe surfaces in crawl spaces, garages, and attics.
Use heat cables on pipes in the most vulnerable locations. Heat cables have built-in thermostats that activate when the pipe surface approaches freezing, providing exactly as much warmth as needed without wasting energy.
If certain pipes in your home freeze repeatedly every winter despite other preventive measures, the long-term solution may be rerouting or better insulating those lines. Our licensed plumbers provide pipe replacement and repiping services for homes where pipe location is the root of recurring freeze problems.
Get Frozen Pipes Safely Thawed by the Experts
If your frozen pipes are in an inaccessible location, if you suspect a pipe has already cracked, or if multiple fixtures have lost water simultaneously, thawing them yourself carries real risk. Our Benjamin Franklin Plumbing team is equipped to locate and safely thaw frozen pipes and assess your system for any damage that develops under pressure.
Call us anytime at (800) 259-7705 or book an appointment online. You can also find a location to connect with your local team.
















 Your Privacy Choices