
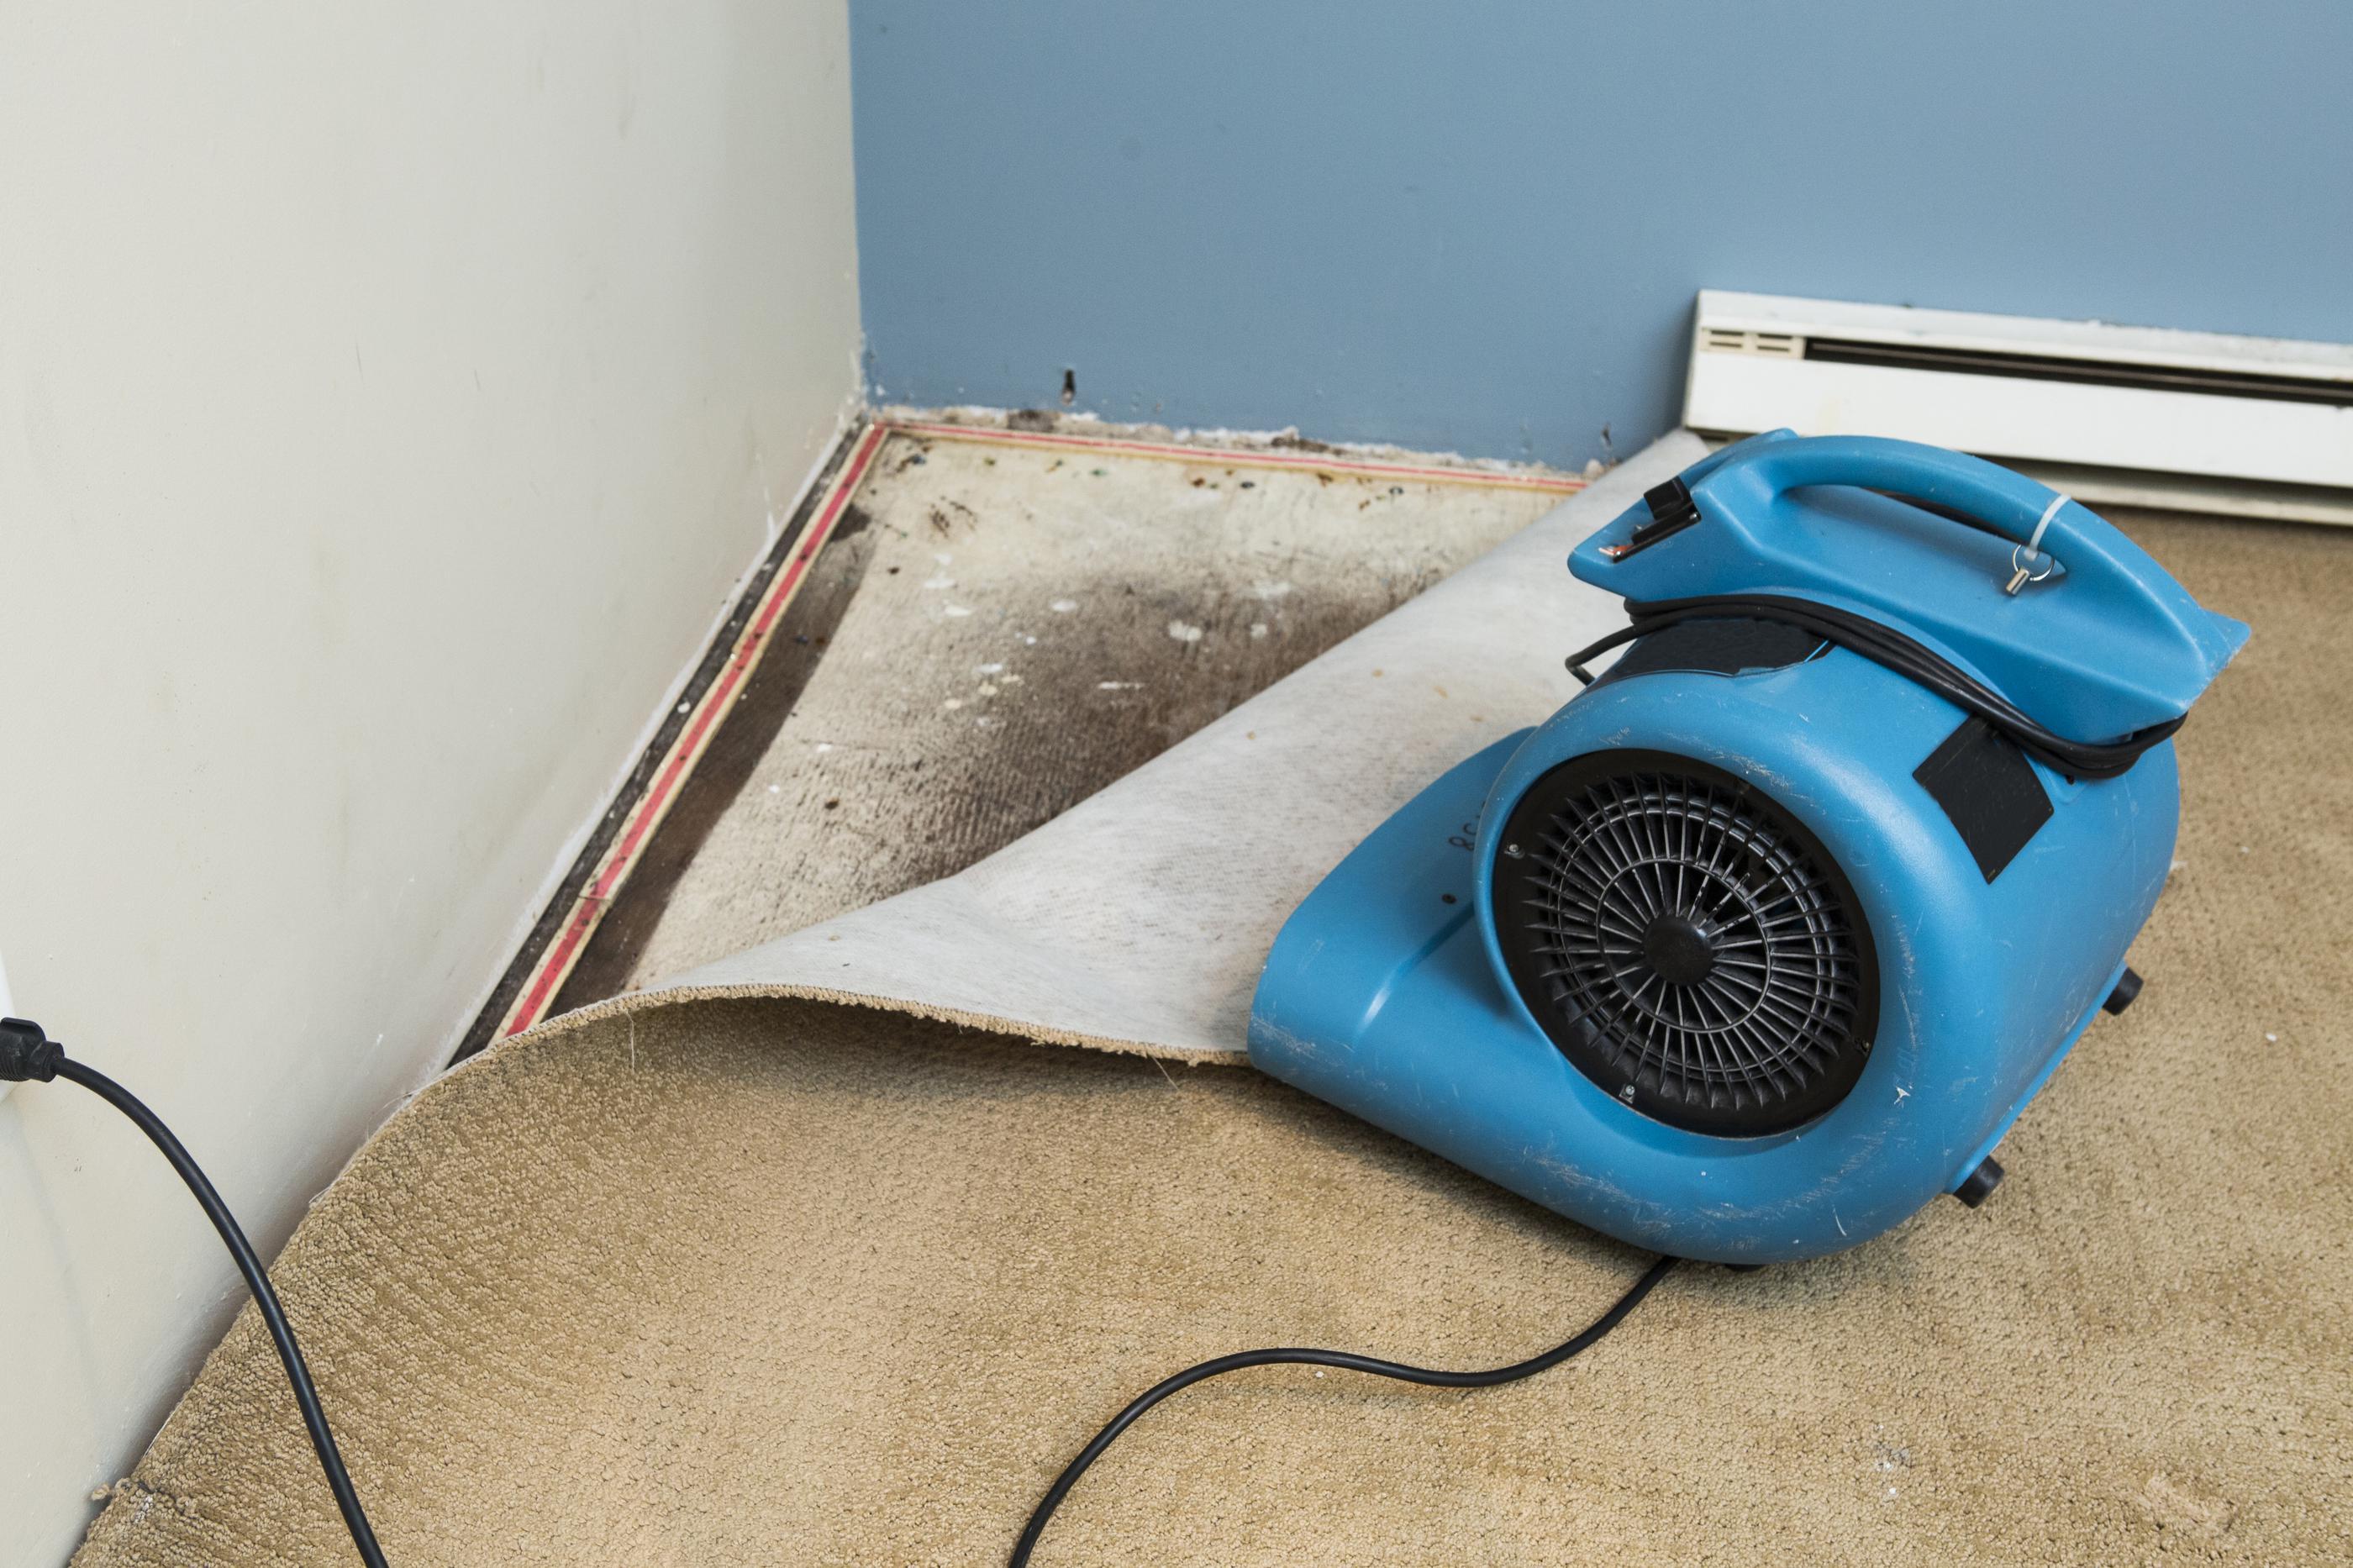
Broken pipes. Backed-up sewers. Natural disasters. These are just a few things that can cause water damage, one of the most serious and time-sensitive issues you may face as a homeowner. Not only can water harm your prized possessions. It can lead to mold and mildew growth within 24 to 72 hours of initial exposure, creating a serious health hazard that compounds with every hour that passes.
Whether the source is a burst supply line, leaking pipes inside a wall, a sewage backup, or storm flooding, the first step is to stop the water source and schedule a professional inspection immediately.
Understanding what that inspection involves helps you know what to expect, how urgently to act, and how to work effectively with both your restoration team and your insurance company.
Our team helps identify and stop the source quickly, then works with restoration professionals to begin cleanup.
What Is a Water Damage Inspection?
A water damage inspection is the first and most critical step in the restoration process. Before any water is removed or any drying equipment is deployed, a certified restoration specialist must assess what type of water is involved, how far it has traveled, and what materials it has saturated. This assessment drives every decision that follows, from what personal protective equipment the crew needs to whether carpet can be saved or must be replaced.
A thorough water damage inspection involves five interconnected steps.
Step 1: Identify and stop the source.
The inspector first confirms that the source of water intrusion has been stopped. For plumbing-related events, this means confirming the water supply has been shut off. For slab leaks or other concealed pipe failures, this may require locating the break before the shutoff can be targeted. No drying process can begin effectively until the water source is confirmed to be stopped.
Step 2: Classify the water contamination category.
The Institute of Inspection, Cleaning and Restoration Certification (IICRC) defines three categories of water contamination that determine the scope and type of decontamination required.
Category 1 water damage means the water came from a sanitary source and does not pose a substantial risk if incidentally ingested or inhaled. Examples include burst supply line pipes, overflowing toilet tanks containing clean water, and broken appliance water lines.
Category 2 water damage means the water is contaminated and could cause illness if ingested or if prolonged skin contact occurs. This is also known as gray water. Common sources include washing machine overflow, dishwasher discharge, and sump pump failures.
Category 3 water damage means the water is grossly contaminated and toxic. This is known as black water. Sources include sewage backups, rising floodwaters, and any standing water that has been left long enough for Category 2 water to degrade further. Category 3 scenarios require full personal protective equipment for the restoration crew and much more aggressive decontamination protocols.
Step 3: Classify the extent of water intrusion.
The IICRC also classifies the physical extent of damage based on how much water is present and how porous the affected materials are. These classes determine how much drying and dehumidification will be required.
Class 1 is the least serious, involving a small amount of water affecting surfaces with low porosity, such as tile or sealed concrete. An example is a toilet overflow onto a bathroom floor with no absorption into the walls or subfloor.
Class 2 involves a large amount of water absorbed into materials with medium to high porosity, such as carpet and drywall, affecting a full room.
Class 3 is when highly porous materials, including insulation, carpet pads, and gypsum board, are saturated throughout a large area.
Class 4 involves water that has penetrated materials with very low permeability, such as hardwood, plaster, brick, and concrete. These situations require specialty drying strategies beyond standard air movers and dehumidifiers.
Step 4: Map moisture with professional tools.
Inspectors use calibrated moisture meters and thermal imaging equipment to detect water that has migrated beyond the visible damage area. Water travels through wall cavities, beneath flooring, and into ceilings before anyone realizes it has spread. This moisture mapping is essential because improperly dried hidden moisture is the leading cause of mold growth after a water event. Our leak detection specialists use similar tools when tracking concealed leaks in residential plumbing systems.
Step 5: Document everything for insurance.
Before any restoration work begins, the inspector creates a room-by-room written log, photographs all affected areas, records moisture meter readings, and notes the damage category and class. This documentation is the foundation of an accurate insurance claim. Thorough documentation at the inspection stage prevents disputes later about the scope of work and the cost of restoration.
The Water Damage Restoration Process
Once the inspection is complete and the action plan is established, restoration follows a clear sequence of steps.
Water extraction.
Technicians begin by removing all standing water using submersible pumps and professional-grade extraction equipment. The faster standing water is removed, the less it penetrates into porous materials and the lower the final class of damage. In flooded basements and large areas, emergency plumbing support may be needed alongside extraction to ensure the water source is fully addressed before restoration begins.
Inspection of carpets and flooring.
After extraction, technicians inspect carpets and carpet pads to determine whether they can be dried in place or need to be removed. Carpet pads almost always need replacement even when the carpet itself can be salvaged, because the pad holds water against the subfloor and creates ideal conditions for mold growth.
Drying and dehumidification.
Technicians deploy professional-grade air movers and dehumidifiers to remove remaining moisture from the structure. Drying typically takes three to five days and is monitored with moisture meters throughout the process to confirm that all materials reach their dry standard before equipment is removed.
Cleaning and sanitization.
Depending on the contamination category, affected materials are cleaned and sanitized. Category 2 and Category 3 events require antimicrobial treatment of surfaces and disposal of any porous materials that cannot be fully decontaminated.
Reconstruction.
Once the structure is confirmed dry, reconstruction addresses materials that were damaged or removed. This may include replacing drywall, flooring, insulation, or structural elements. In some cases, wooden trim boards can be reused and drywall can be repaired. If there are problems with the structural framework, a full rebuild of the affected area is required.
READ MORE: First Steps After Water Damage
Why 72 Hours Is the Critical Window
Mold spores are present in virtually every indoor environment. Under normal dry conditions, they are harmless. But once a surface stays wet for 24 to 72 hours, mold can begin to colonize. This is why speed matters so much in water damage response. A Class 1 event addressed immediately may cost very little to remediate. The same event left for a week can become a bathroom mold problem requiring extensive remediation. Acting on a water event within the first few hours, not the first few days, is the most important decision you make.
READ MORE: Water Damage and Homeowners Insurance Claims
What Does Water Damage Restoration Cost?
Cost varies significantly depending on the category and class of damage, the affected square footage, the materials involved, and the geographic location of the home. For general planning purposes, restoration work for a contained event, such as a single-room Category 1 water loss, will cost far less than a Category 3 sewage backup affecting multiple rooms. A plumber's assessment of the plumbing source, combined with the restoration team's damage classification, gives you the most accurate picture of total costs before any work begins.
How Long Does Water Damage Restoration Take?
Like cost, the timeline depends on the extent of the damage. Structural drying alone typically takes three to five days. If mold has had time to develop, remediation adds time. Replacing damaged flooring can take up to a week and a half once the subfloor is confirmed dry. Replacing structural elements, such as framing or wooden beams, adds additional days. The restoration team's monitoring process during drying determines when the next phase can begin.
How to Prevent Water Damage
One of the most important things you can do as a homeowner is stay alert to early signs of plumbing leaks. Discolored spots on walls or ceilings, a water meter that runs when nothing is on, and unexplained increases in your water bill are all signals worth investigating promptly.
In winter, watch for the warning signs of frozen pipes, which can burst suddenly and release large volumes of water into wall cavities and finished spaces before anyone notices. It is also important to monitor your water pressure. High water pressure places constant stress on pipe joints, supply connections, and appliance hoses, and is one of the more common underlying causes of sudden supply line failures.
A preventive plumbing inspection once a year is one of the most effective steps you can take. A licensed plumber can check supply lines, shutoff valves, water heater connections, and other high-risk components for signs of wear before they fail.
We're Here When You Need Us
If you suspect you have a plumbing leak in your home, Benjamin Franklin Plumbing can help identify and repair the source. Call us anytime at (877) 657-4336 or book an appointment online. You can also find a location to connect with your local Benjamin Franklin Plumbing team.













 Your Privacy Choices