
Key Takeaways About Water Supply Lines
A water supply line brings potable water from the meter or well into your home. This summary is for homeowners and property managers who notice signs and need to act before damage grows.
- Identify unexplained meter movement or sudden bill increases quickly.
- Prevent further damage by documenting readings and visible defects.
- Avoid emergency excavations by using noninvasive leak locating methods.
- Spot pressure loss and discolored water as early warning signs.
- Reduce repair scope by recording moisture and pressure test results.
- Plan inspections with a professional when symptoms repeat or spread.
Introduction
A water supply line problem can start small and become costly if ignored. Homeowners often miss early signals like higher than expected water bills or slow drains. Unchecked issues can damage walls, floors, and appliances over time. Knowing the warning signs helps protect a home and budget.
Reduced water pressure is a common early sign that something is wrong with the supply line. You might notice weak flows at multiple fixtures rather than a single tap. Discolored water or a metallic taste often points to corrosion, sediment, or a disturbed line. Those changes deserve prompt attention to avoid health or appliance risks.
Damp spots, wet soil, or unexplained puddles near foundations usually mean a leak in the buried supply line or a failing shutoff valve. Recurring leaks that reappear after repairs suggest a deeper issue with the main supply or connections. Persistent moisture can lead to mold growth and structural damage when left unaddressed. Fast action reduces repair scope and long term costs.
Homeowners in Myrtle Beach, SC and properties in Conway, SC notice these signs differently depending on home age and plumbing materials. A professional will inspect visible pipes, shutoff valves, and the pressure-reducing valve when diagnosing a suspected supply line issue. Simple checks and diagnostic readings often clarify whether repairs or replacement are needed. Knowing what to watch for makes discussions with a plumber clearer and more effective.
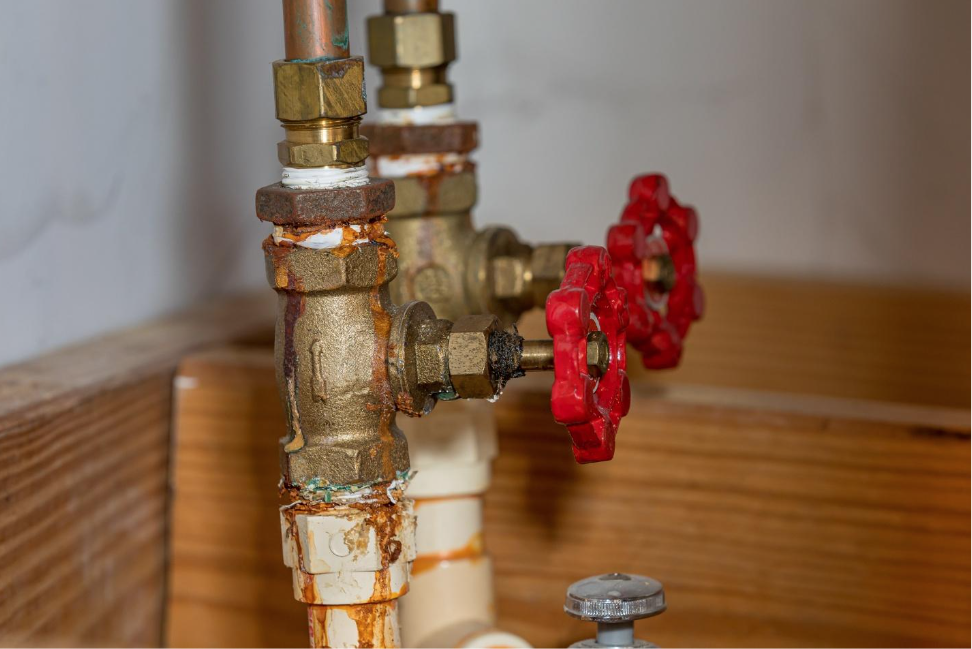
Photo from iStock - Credit: JJ Gouin
How a Water Supply Line Works and Why It Fails
A water supply line delivers potable water from the street or well to a home's plumbing system. The main components include the meter, shutoff valve, pressure-reducing valve if present, and the network of supply pipes that feed fixtures. Wear, corrosion, ground movement, and tree roots cause failures over time. Knowing what each component does helps homeowners spot where a problem starts and spreads.
- Meter can show continuous flow.
- Shutoff valve isolates the house supply.
- Pressure-reducing valve protects plumbing from high pressure.
- Supply pipes carry water to fixtures and appliances.
- Connections and fittings join system segments.
Pipe material affects failure modes and service life, so identifying materials is useful when diagnosing issues. Older galvanized steel tends to corrode from the inside, while copper can develop pinhole leaks in certain conditions. Plastic pipes resist corrosion but can be damaged by UV exposure or improper burial. A homeowner asking "what causes my low pressure?" should note pipe material and visible corrosion as key clues.
Buried supply lines fail differently than indoor piping and often show indirect signs before visible leaks. Look for soggy ground, sinkholes, or unusually lush grass where the line runs as early indicators. Professionals verify these signs with a pressure gauge, moisture meter, and by isolating the meter and house shutoff. These simple checks help confirm whether the issue sits inside the house or in the buried lateral from the street.
Diagnosing a failing supply line usually follows a clear sequence so homeowners understand the process. A tech will first read the water meter and shut off fixtures to test for continuous flow, then use a pressure gauge at an accessible valve to check system pressure. If needed, they inspect visible supply pipes, test the pressure-reducing valve, and use moisture readings to locate buried leaks.
Unexplained High Bills as A Warning Sign
Unexpected spikes in your water bill can point to a hidden problem along the water supply line rather than routine usage changes. A steady bill increase without behavior change often means continuous flow from a leak or a faulty toilet flapper drawing water. Check for the toilet running sound or reduced tank level as simple homeowner checks before calling a pro. If those checks show nothing, the issue likely sits in the supply line or a buried lateral that you cannot see.
To confirm a hidden leak, a professional will start with the water meter and a simple isolation test that homeowners can also perform. They will record the meter reading, avoid using any water for an hour, then read the meter again to detect continuous flow. If the meter moves, the tech narrows the cause by shutting off the house shutoff valve and watching the meter at the curb or meter box. This step separates internal fixture leaks from a supply line problem outside the home.
Technicians then use pressure gauges and visual inspections at the pressure-reducing valve, service saddle, and main shutoff to locate the leak zone. They may attach a pressure gauge to a hose bib or test port to watch for unexplained pressure loss while fixtures remain closed. Moisture meters, listening probes, or thermal imaging help find buried wet areas without unnecessary digging. The goal is to provide a clear diagnosis so you can decide on repair versus replacement with measured information.
Homeowners in Myrtle Beach, SC or owners of older properties in Conway, SC should track billing patterns and note when spikes occur during colder or warmer months. Keep records of meter readings and photos of any visible water damage to share with a technician during inspection. If a diagnosis confirms a supply line leak, ask for a written report that shows test readings and recommended next steps. That documentation helps compare repair options and clarifies whether a full replacement of the supply line is necessary.
Reduced Water Pressure and What to Check
When multiple fixtures show weak flow, check the main shutoff and the visible supply pipes first. Turn off all faucets and read the water meter to see if the meter still moves, which helps isolate the problem. A simple pressure gauge attached to an outdoor hose bib or a test port gives a clear reading of system pressure under no-flow conditions. Low static pressure on that gauge suggests an issue upstream in the water supply line or at the pressure-reducing valve.
Listen for unusual sounds near the meter, shutoff, or PRV while someone opens a faucet slowly to observe pressure response. A hammering or sputtering noise during flow can point to trapped air, failing check valves, or a damaged section of supply pipe. Inspect accessible shutoff valves for stiffness, leakage, or mineral buildup that limits flow even when valves appear open. If a pressure-reducing valve is present, note whether downstream pressure rises when the valve is manually cycled.
Professionals confirm the diagnosis by isolating house plumbing from the meter and watching pressure and meter readings while under controlled conditions. They may remove a hose bib spigot to install a pressure gauge or use a pressure gauge on the PRV test port for accurate measurements. Technicians also inspect visible copper, PEX, or galvanized pipe runs for kinks, pinholes, or heavy corrosion that reduce internal diameter and pressure.
If simple checks suggest the problem sits in the buried lateral or inside the meter box, require a trained technician to proceed with noninvasive leak detection or excavation planning. A professional will document pressure readings, meter behavior, and visible defects in a written report to guide repair decisions. Before any digging, they locate the lateral and mark underground utilities to avoid accidental damage during excavation. Ask for a clear explanation of findings and recommended next steps so you can compare repair or replacement options confidently.
Discolored or Smelly Water Causes and Actions
Discolored or smelly water often signals contamination or disturbed pipe lining rather than just the fixture. Brown, red, or yellow tint usually means rust from corroded pipes or disturbed sediment in the water supply line. A rotten egg odor typically points to hydrogen sulfide produced by bacteria in the line or water heater. If you notice taste changes, avoid drinking until the source is identified and flushed.
- Check whether the discoloration appears at one faucet only.
- Run cold water for several minutes to see if it clears.
- Note whether hot water shows the same color or smell.
- Record when the change started and any recent plumbing work.
If flushing faucets does not clear the water, a professional will perform targeted tests to locate the problem. They may take water samples for lab testing to check bacteria, iron, manganese, or other contaminants. A tech also inspects the visible supply line, fittings, and the water heater for internal corrosion or bacterial growth. Those steps confirm whether the supply line, heater, or internal plumbing needs repair or replacement.
In a common situation, homeowners see brown water after city work or a nearby repair and call for diagnostics right away. A technician would first check the meter and shutoff, then isolate sections and use a pressure gauge and visual checks to replicate the issue. They might recommend a shock chlorination if bacteria are present or replacing corroded sections when iron levels remain high.
Damp Areas and Foundation Concerns to Monitor
Standing water near foundation walls or persistently damp basements often signals a compromised water supply line buried near the house. Look for soft spots in landscaping, masonry staining, or paint blistering on foundation walls that appear without other obvious causes. A moisture meter reading above normal basement levels helps confirm abnormal wetness before invasive work begins. If you see these cues, document locations and timing to share with a technician during inspection.
Slow soil settling or new sinkholes near where the supply line runs can result from ongoing leaks that wash soil away over time. A professional will check the water meter while all fixtures are off to confirm continuous flow indicating an external leak. They may then use a moisture meter and listening probe along the foundation to pinpoint saturated zones without digging. Those noninvasive checks narrow the search and limit excavation size if repair becomes necessary.
Mold growth, musty odors, or wood rot at floor junctions often means moisture reached structural components from a nearby supply line leak. During diagnosis, a technician will inspect the shutoff valve, accessible supply piping, and the pressure-reducing valve to rule out internal sources. If internal sources are clear, attention shifts to the buried lateral and the meter area, where excavation or targeted exposure may be required. Photographs and written readings from the inspection help you compare repair options later.
For older systems in Conway, SC, monitor foundation perimeter drainage when damp spots appear after normal rain. A professional may recommend temporary steps like redirecting downspouts, then perform targeted leak locating using pressure gauges and moisture readings to confirm the supply line cause. If the diagnosis indicates a failing buried supply line, plan repairs that include clearing utilities, exposing the lateral, and replacing damaged sections. Keep records of the diagnosis and options to help decide between repair or full replacement of the supply line.
Recurring Leaks Versus Single Incident Responses
When a leak returns after repairs, treat it as a symptom, not a one-off failure. Recurring leaks often mean the repair addressed the visible damage but not the underlying cause. A professional will inspect joints, shutoff valves, and the supply line trench for signs of movement or missed corrosion. Expect documented findings showing whether the issue is repairable or indicates a larger section needs replacement.
Single incident leaks from a damaged fitting or accidental puncture usually respond well to a targeted repair. Technicians confirm a repair by isolating the section, drying the area, and pressure-testing the patched fitting for stability. They may install a temporary clamp or replace a short length of pipe if the condition allows. After testing, they record pressure readings and visual checks to show the fix holds under normal system pressure.
For recurring leaks, professionals expand the diagnostic steps and use tools like a pressure gauge, moisture meter, and visual inspection of the meter box. They will perform an isolation test, then monitor the meter while sections are isolated to find continuous flow sources. In a common situation, a homeowner reports soggy soil returning within weeks, and the tech checks the service saddle, meter connections, and buried lateral for hairline fractures. The results guide whether to excavate and replace a longer lateral or repair multiple problem spots.
Decisions often weigh repair longevity against disruption and cost, so ask for a clear comparison of options based on inspection outputs. Photos, pressure readings, and a written estimate help you compare short-term repairs versus full section replacement. Homeowners can use these diagnostics to decide when a full lateral replacement reduces repeat calls. If you face recurring leaks, call a professional for thorough diagnostics before approving further work.
When to Call a Professional Water Supply Line Service
If you notice repeated symptoms or uncertainty after basic checks, call a professional water supply line service to avoid added damage. A trained technician will perform controlled isolation tests and pressure readings to confirm whether the issue is inside the house or in the buried lateral. They will also check the meter box, service saddle, and accessible fittings to document where flow or pressure losses occur. Ask for a written diagnostic that lists readings and recommended next steps so you can compare repair options.
- Schedule an inspection during normal water usage hours.
- Ask the technician to record meter readings.
- Request moisture meter or listening probe findings.
- Ask for photos of visible defects.
- Get a written comparison of repair versus replacement.
Call sooner if you find continuous meter movement with all fixtures closed or if damp soil spreads near the foundation. A professional will use a pressure gauge and moisture meter and may perform targeted noninvasive leak locating to limit excavation. They will also verify shutoff valve operation and test the pressure-reducing valve if present. This approach clarifies whether a localized repair or a longer lateral replacement is necessary.
For properties in Myrtle Beach, SC and homes in Conway, SC, request documentation showing test readings and the inspected pipe material. If contaminants or discolored water accompany leaks, insist on water sampling or further checks to rule out contamination. When safety risks exist, a licensed technician will recommend stopping water use until repairs or mitigations occur. Schedule service when you can be present to review findings and make an informed decision.
Preventive Maintenance Tips for Homeowners to Follow
Schedule simple seasonal checks in Myrtle Beach, SC, to reduce the chance of a sudden water supply line failure. Inspect the visible meter box and accessible shutoff valve for leaks, corrosion, or standing water around fittings. Run a pressure gauge test at an outdoor spigot when family water use is low to record a baseline pressure reading. Keep these readings in a log to spot gradual declines that suggest an unseen problem.
Protect exposed piping and the pressure-reducing valve from temperature swings and physical damage where possible. Insulate outdoor spigots and any short sections of supply line in unheated spaces to prevent stress and freezing-related strikes. Exercise shutoff valves twice yearly to ensure they turn smoothly and fully close without seizing or leaking. If a valve feels stiff or leaks after cycling, plan a professional inspection to avoid emergency failures.
Monitor landscaping and soil moisture near the service route, especially after watering or heavy rain, to catch unusual wet zones early. Check around foundations and beneath slabs for new soft spots, sinkage, or green, lush patches of grass away from irrigation lines. If you detect these signs, arrange a noninvasive leak locate before digging or altering grading.
Keep accurate records of any past repairs, meter readings, and photos of problem areas to share with a technician during diagnosis. When calling a professional, request documented pressure readings, moisture meter outputs, and photos of exposed defects so you can compare recommendations properly. Consider scheduling routine inspections with a qualified plumber to check service saddles, connections, and lateral condition before symptoms worsen. Prepared homeowners make better repair decisions and often avoid last-minute emergency excavations.

 Your Privacy Choices