
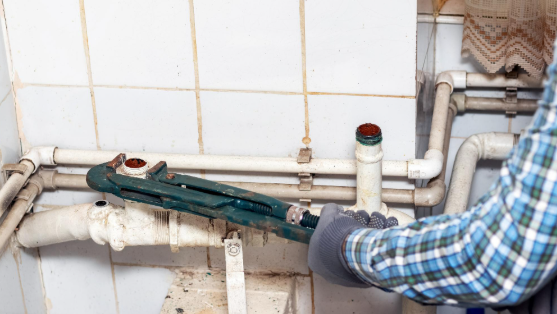
Most homeowners never think about the pipes inside their walls until those pipes start failing in visible ways. Rusty water from the tap. Water pressure that used to be strong and now barely reaches the second floor shower. A pinhole leak that shows up this month, gets patched, and is followed by another one three months later in a completely different spot.
These are not isolated problems. They are symptoms of a plumbing system reaching the end of its useful life, and in many Lee's Summit homes built before the 1970s, that system is still running on galvanized steel pipe that was never meant to last this long. Repiping, replacing the home's water supply lines with modern material, is not a small decision, but it is often the only real fix once a system reaches this point.
This guide covers the real signs a home needs repiping, what materials make sense for a modern repipe, how the process actually works, and what drives the cost up or down. Benjamin Franklin Plumbing of Kansas City handles plumbing repairs and repiping projects across the metro regularly, and the patterns below reflect what technicians actually find behind Lee's Summit walls, not a generic checklist.
In this article, you will learn about:
- The real signs a home needs repiping
- Which pipe materials make sense for a modern repipe
- How the repiping process actually works
- What drives repiping cost up or down
Keep reading to find out why one specific pipe material was banned from new construction for a very good reason, and what that means for homes that still have it.
The real signs a home needs repiping
Repiping is rarely the first thing a homeowner considers when something goes wrong. It usually comes after months or years of smaller symptoms that eventually add up to an obvious pattern.
Most of these signs share a common thread: they point to the pipe material itself failing from the inside, not to a single fixture or a one-time plumbing mistake. Recognizing that distinction early is what separates a homeowner who catches the problem in time from one who ends up dealing with an emergency.
Persistent low water pressure
Water pressure that has gradually declined over years, rather than dropping suddenly, is one of the clearest signs of interior pipe corrosion. As galvanized steel pipe ages, mineral deposits and rust build up along the interior walls of the pipe, narrowing the usable diameter and restricting flow. This happens slowly enough that many homeowners do not notice until the pressure difference becomes dramatic, often only when compared to a neighbor's newer home or a hotel shower.
This is a different problem from a low water pressure issue caused by a single fixture or valve, since corrosion-driven pressure loss shows up across the whole home rather than at one tap.
Low pressure caused by corrosion affects the whole home fairly evenly, unlike a single clogged fixture aerator or a localized blockage, which only affects one tap. If multiple fixtures throughout a home all show reduced pressure, and cleaning the aerators does not fix it, the cause is very likely inside the pipe walls themselves rather than at the fixture.
- Water pressure that has declined gradually over years rather than suddenly
- Reduced pressure affecting most or all fixtures in the home, not just one
- No improvement after cleaning or replacing individual fixture aerators
- A noticeable pressure difference between upper floors and the ground floor
A whole-home pressure problem with no single obvious cause is one of the strongest indicators that the supply lines themselves have narrowed from the inside, which cleaning or spot repairs cannot fix.
Discolored water and recurring leaks
Rusty or brown water, particularly right after the water has sat unused for a while (first thing in the morning, or after returning from a trip), points directly to corrosion inside galvanized pipe. The rust scale that builds up on the interior pipe wall gets disturbed by water flow and ends up coming out of the tap, and this pattern tends to get more frequent as the pipe continues to deteriorate.
Recurring pinhole leaks are an even stronger signal. A single leak can be a fluke, a manufacturing defect in one fitting, a nick during a renovation. Multiple leaks appearing in different locations over a relatively short period is a sign that the corrosion process is happening throughout the entire system, not just at one weak point, and patching each leak as it appears becomes an expensive game of whack-a-mole against a problem that is only getting worse. This is also a good time to confirm the home's water isn't unusually hard water, since mineral-heavy water accelerates the same corrosion process from the inside.
- Note whether discoloration happens consistently after water has sat unused
- Track whether leaks are isolated incidents or a recurring pattern across different locations
- Consider the age and material of the home's pipes when evaluating either symptom
- Recognize that patch repairs on a genuinely failing system only delay, not solve, the underlying problem
Homeowners who have paid for the same type of repair more than once in a year or two are usually better served financially by addressing the whole system rather than continuing to fund one-off fixes on a pipe network that is actively failing.
Pipe material and home age
The single most reliable predictor of whether a home needs repiping is not any specific symptom. It is pipe material and home age. Homes built before the 1960s in this region often still have original galvanized steel supply lines, and homes built between the late 1970s and mid-1990s sometimes have polybutylene pipe, a plastic material that was widely used as a cheaper alternative to copper before it was pulled from the market due to a well-documented pattern of sudden, catastrophic failure.
Lead pipe is the most extreme version of this problem nationally: the EPA estimates roughly 4 million lead service lines still serve properties across the country, and while lead pipe itself was banned from new plumbing installations in 1986, older homes and even some galvanized pipe connected to lead lines can still carry the contamination risk forward.
The health stakes are real even at low exposure levels: CDC data shows roughly 2,500 out of every 100,000 U.S. preschool children have historically tested above the agency's blood lead reference threshold, which is part of why lead and galvanized-connected pipe gets treated as a genuine priority rather than just an inconvenience.
A homeowner who is not sure what pipe material runs through their home's walls can often get a good indication from an exposed section in a basement, crawlspace, or utility closet. Galvanized pipe is a dull gray metal, often visibly corroded or rusted at joints. Polybutylene is typically gray plastic tubing, sometimes marked with a printed code on the pipe itself. Neither of these should be considered a long-term solution regardless of whether visible symptoms have appeared yet.
- Galvanized steel (common in homes built before the 1960s), a metal pipe prone to internal corrosion
- Polybutylene (common in homes built between the late 1970s and mid-1990s), a plastic pipe with a documented history of premature failure
- Copper (still a durable, long-lasting option when properly installed and maintained)
- PEX (the modern standard for new installations and most repipe projects today)
Knowing which material is actually in a home's walls changes the urgency of the conversation considerably. A home with copper pipe showing early wear is a very different situation than a home that still has its original galvanized or polybutylene lines.
Which pipe materials make sense for a modern repipe
Not all repiping materials are created equal, and the choice matters for both immediate cost and long-term reliability.
Choosing the right material is not just a preference question. It directly determines how long the new investment lasts and whether the same failure pattern that triggered the repipe in the first place has any chance of showing up again.
PEX: the modern standard
PEX, cross-linked polyethylene, has become the dominant material for residential repiping over the past two decades, and for good reason. It is flexible enough to route through walls and around obstacles with fewer joints than rigid pipe requires, which reduces both labor time and the number of potential failure points in the system.
It also resists the mineral scale buildup that plagues galvanized steel, and it handles freezing conditions better than rigid copper, since it can expand slightly without bursting.
PEX is color-coded by convention, red for hot lines and blue for cold, which makes future work on the system easier for any plumber who opens up a wall later. It connects using crimp rings, clamp rings, or expansion fittings rather than solder, which speeds up installation and reduces the fire risk that comes with soldering copper joints inside an occupied home.
- Flexible routing reduces the number of joints and fittings needed compared to rigid pipe
- Resistant to the mineral scale buildup that causes galvanized pipe to fail
- Handles freezing better than rigid materials, reducing burst-pipe risk in cold snaps
- Faster installation with mechanical fittings rather than soldered joints
The main tradeoff with PEX is that it cannot be exposed to prolonged UV light, so any exterior or sunlit installation needs proper protection, but for the interior wall and crawlspace routing that makes up the vast majority of a residential repipe, this is rarely a practical limitation. Homes that also need sewer line work at the same time sometimes coordinate that project alongside a repipe, since both involve opening up walls or floors and doing them together can reduce total disruption.
Copper: still a durable option
Copper pipe has a long track record and remains a solid choice for homeowners who prioritize a traditional, rigid supply line, particularly in applications where PEX's flexibility is less of an advantage. Properly installed copper resists corrosion far better than galvanized steel and can last for decades without significant degradation.
The tradeoffs with copper are cost and installation complexity. Copper pipe itself costs more than PEX, and soldered joints require more skilled labor and more time to install correctly, which increases the total project cost for a whole-home repipe. Copper can also be vulnerable to pinhole leaks in areas with acidic or aggressive water chemistry, a factor worth discussing with a plumber familiar with the local water supply before choosing it over PEX.
- Long track record of durability when properly installed
- Rigid, traditional supply line material still specified in some situations
- Higher material and labor cost compared to PEX
- Vulnerable to pinhole leaks in homes with acidic or aggressive water chemistry
For most whole-home residential repipe projects, PEX has become the practical default, but copper remains a legitimate choice worth discussing, especially for specific sections of a system where its rigidity offers a real advantage.
Materials that no longer belong in a home
Galvanized steel and polybutylene are the two materials that should never be reinstalled during a modern repipe, regardless of cost savings. Both have well-documented failure patterns, and choosing either one to save money upfront simply guarantees another repiping conversation years sooner than necessary.
A contractor who suggests reusing sections of galvanized pipe to reduce cost, or who offers polybutylene as a budget option, is not doing the homeowner a favor. Both materials carry the exact problems this guide describes from the start, and patching a modern repipe with legacy material undermines the entire point of doing the project in the first place.
- Galvanized steel: prone to internal corrosion regardless of remaining external condition
- Polybutylene: a documented history of sudden, catastrophic failure under normal water pressure
- Lead or lead-connected fittings: a health risk that should be fully removed, not partially addressed
- Any material a contractor cannot clearly explain the expected lifespan and failure pattern for
A repipe is the one chance to fully eliminate these materials from a home's system. Cutting corners on material choice at this stage defeats the purpose of the project entirely. This same principle extends to the water heater connections in a home, since old supply lines feeding that unit are often made of the same aging material as the rest of the system and get overlooked if an assessment only checks visible fixture lines.
How the repiping process actually works
Understanding what a repipe actually involves, start to finish, helps set realistic expectations for both the timeline and the disruption to daily life.
A well-run repipe follows a predictable sequence: assessment and planning, then the actual pipe replacement, then finishing and cleanup. Knowing what happens at each stage helps a homeowner recognize when a contractor is following a sound process versus rushing through steps that matter.
The assessment and planning phase
A proper repipe starts with a thorough assessment of the existing system: what material is currently in place, how the home's layout affects routing options, and which walls, floors, or ceilings will need access points. A technician mapping this out in advance minimizes surprises once the actual work begins, and it allows the homeowner to plan around the disruption rather than being caught off guard mid-project.
This phase also includes deciding on fixture and access strategy. Most modern repipes use a technique that opens small, strategic access points rather than tearing out entire walls, routing new PEX lines through existing cavities wherever possible. The goal of a well-planned repipe is to accomplish the full replacement with the minimum reasonable amount of drywall and finish work needed afterward.
- Full assessment of current pipe material, age, and routing throughout the home
- Identification of the most efficient access points to reach existing pipe runs
- A clear plan for which fixtures will be offline and when during the project
- Coordination on drywall, patching, and finish work needed after the plumbing itself is complete
A homeowner who understands this plan in advance, including which rooms will be affected on which days, has a much smoother experience than one who is only told "we'll be repiping the house" with no further detail.
What happens during installation
Once the plan is set, a typical whole-home repipe runs over several days depending on the home's size and layout complexity. Water service is temporarily shut off in sections as old pipe is removed and new lines are run, though most reputable contractors work to minimize how long any given area goes without water.
Old pipe removal and new pipe installation typically happen room by room or section by section rather than disconnecting the entire home's water at once for the full project duration. This staged approach keeps at least some part of the home functional throughout most of the process, which matters considerably for a family still living in the home during the work.
- Water service temporarily shut off in sections as work progresses, not the whole home for the entire project
- New pipe routed through existing wall and floor cavities wherever the layout allows
- Old pipe removed and disposed of as new sections are completed
- Pressure testing performed on new lines before walls are closed up
Pressure testing before closing any wall is not optional. It is the step that confirms every joint and connection is sound before the drywall goes back up, and skipping it in the name of speed is a shortcut that eventually costs far more than it saves.
Finishing and cleanup
The final phase of any repipe involves patching the access points created during installation, and reputable contractors treat this as part of the job rather than an afterthought left for the homeowner to handle separately. Drywall patches, texture matching, and paint touch-ups should be part of the discussion before the project starts, not a surprise gap in scope once the plumbing work is finished.
A final walkthrough with the homeowner, testing every fixture in the home for proper pressure and confirming no leaks have developed, closes out the project properly. This step matters because a repipe is a significant investment, and the confirmation that everything works correctly before the crew leaves protects both the homeowner and the contractor from disputes later.
- Patch and finish all access points created during the installation
- Test every fixture in the home for proper water pressure and flow
- Confirm no leaks have developed at any new connection point
- Walk through the completed project with the homeowner before considering the job finished
A repipe that ends with a rushed walkthrough or unfinished patchwork is not actually complete, regardless of whether the pipes themselves are correctly installed.
What drives repiping cost up or down
Repiping cost varies significantly from home to home, and understanding what actually moves the number helps a homeowner evaluate a quote with real context.
No single factor determines the final price on its own. Home size, layout, material choice, and timing all interact, which is why two homes that look similar on paper can end up with meaningfully different quotes.
Home size and layout complexity
The most obvious cost factor is simply how much pipe a home needs, which correlates closely with square footage and the number of bathrooms and water-using fixtures. A single-story home with a simple, open layout is generally faster and less expensive to repipe than a multi-story home with a complex floor plan, since routing new pipe through multiple floors and finished ceilings adds both material and labor time.
Access matters as much as size in many cases. A home with an accessible basement or crawlspace allows a plumber to run most of the new supply lines without extensive wall cutting, while a home built on a slab foundation with finished walls throughout requires more invasive access and more finish work afterward.
Two homes of identical square footage can have meaningfully different repipe costs based on this factor alone. Homes with a finished sump pump system in the basement sometimes add a small layer of coordination too, since that equipment and its wiring often share the same mechanical space a repipe crew needs to access.
- Total square footage and number of bathrooms or water fixtures
- Number of stories and complexity of the floor plan
- Availability of a basement or crawlspace for easier pipe routing
- Foundation type, since slab foundations generally require more invasive access
A homeowner comparing quotes should ask specifically how each contractor plans to route the new pipe, since a significantly cheaper quote sometimes reflects a less thorough routing plan rather than genuine efficiency.
Material choice and finish work
Material choice affects cost directly, with PEX generally coming in less expensive than copper for both materials and labor, given the faster installation process. The scope of finish work needed afterward, drywall patching, texture matching, paint, also varies based on how invasive the access points needed to be, which ties back to the home's layout and foundation type discussed above.
Homeowners should be wary of any quote that does not clearly separate the plumbing work itself from the finish work required afterward, since a low plumbing bid paired with an unclear finish-work allowance can end up costing more in total than a single, transparent quote that accounts for both from the start.
- Confirm which pipe material is being quoted and why it fits the specific home
- Ask whether drywall patching and finish work are included in the quote or billed separately
- Get a clear scope of exactly which areas of the home will need wall or ceiling access
- Compare quotes on total project cost, not just the plumbing labor line item alone
A transparent, itemized quote that separates plumbing labor, materials, and finish work protects the homeowner from surprises and makes it far easier to compare multiple contractors on an apples-to-apples basis.
The real cost of waiting
Delaying a repipe on a home with genuinely failing pipe material does not make the eventual cost go away. It usually increases it, since ongoing leaks cause water damage that requires its own separate repair, and a system that fails suddenly rather than on a planned schedule often forces an emergency response at a higher cost than a planned project would have carried.
The scale of aging pipe infrastructure is not just a home-level issue either. Research from Utah State University's Utah Water Research Laboratory found that 33 percent of water mains nationwide are now past their average 53-year failure age, a reminder that the corrosion clock runs on public infrastructure and private home plumbing alike, and neither gets more affordable to fix by waiting.
- Ongoing water damage from slow leaks that goes unaddressed until it becomes visible
- The higher cost of true emergency plumbing response versus a planned project
- Insurance complications, since some insurers scrutinize claims tied to known deteriorating pipe materials like polybutylene
- The cumulative cost of repeated patch repairs that a full repipe would have eliminated
A planned repipe, scheduled on the homeowner's terms rather than forced by a sudden failure, is almost always the more cost-effective and less disruptive path once the underlying pipe material has reached the point where failure is a matter of when, not if. Regular seasonal upkeep, like the habits covered in a winter plumbing checklist, can catch early warning signs before they force that unplanned decision.
Conclusion
Repiping is a significant project, but for a Lee's Summit home with original galvanized steel or polybutylene supply lines, it is often the only real solution to a problem that patch repairs cannot fix. Recognizing the real signs, declining pressure, discolored water, recurring leaks, and understanding pipe material and home age, helps a homeowner make an informed decision before a slow-building problem becomes a genuine emergency.
The right approach is a clear, honest assessment of the home's current system, a transparent explanation of material options and cost factors, and a well-planned installation process that respects the homeowner's daily life throughout the project.
If a Lee's Summit home is showing signs of aging pipe, low pressure, discolored water, or leaks that keep coming back in different spots, Benjamin Franklin Plumbing of Kansas City is ready to assess the system honestly and lay out exactly what a repipe would involve before any work begins.

 Your Privacy Choices