Plumbing looks intimidating (and a little stinky), but there are a couple of plumbing projects that are easy enough for a homeowner to do themselves. The next time you have one of these annoyingly prevalent problems, you should feel free to fix it yourself!
If you have the right tools, some good instructions, and a little patience, you might surprise yourself with what you can accomplish. Here are four plumbing repairs that you could quickly and easily learn on your own.
Leaky Faucet
Why It Happens
Usually, leaking faucets happen when the O-ring in the faucet’s knobs wear away. An O-ring is a rubber, circular fixture that’s responsible for forming a watertight seal between the water supply and the faucet.
When O-rings get worn down, openings may appear in the rubber that is just small enough to let a little water through. That water is the drip you know and definitely don’t love.
What You Need
- Adjustable wrench
- Screwdriver
- Replacement washers and/or O-rings
How to Fix It
- Turn off the water to the faucet you want to fix.
- Remove caps covering the handle knobs with your screwdriver.
- Locate the screw that secures the faucet handle to its stem and unscrew it.
- Once the screw is removed, use your screwdriver to remove the handle itself.
- Use a screwdriver to loosen the packing nut until you can access the stem.
- Remove the stem (you may need to twist it off, depending on your sink).
- After the stem is removed, you should be able to see the O-ring and washer in the seat of the valve. Remove the washer and replace it with the new one. Do the same with the O-ring. Make sure the replacement washer and O-ring are the right size and shape. You may want to consider taking the washer and/or the O-ring to your hardware store to make sure the replacements you purchase will work correctly.
- After installing the replacement washer and O-ring, reassemble the faucet knob in this order: O-ring, stem, packing nut, screw, handle. Test the faucet to ensure you’ve fixed the leak.
First, turn off the water to the faucet you want to fix. Then, if there are any caps over the handle knobs, remove them with your screwdriver.
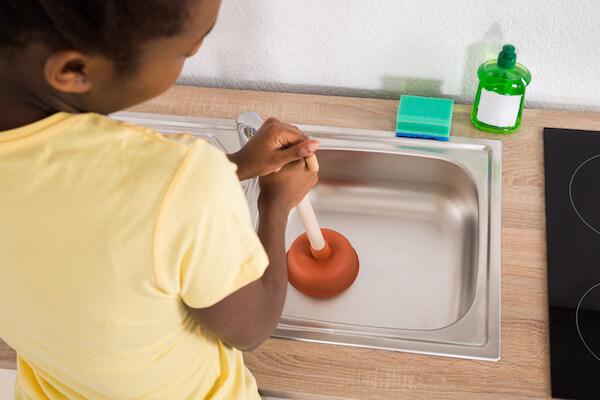
Clogged Drain
Why It Happens
Any drain can clog, and it can happen for all kinds of reasons. Different kinds of appliance drain clog for different reasons and often require different kinds of responses. Clogs happen all the time, and most of them can be cleared out relatively easily and quickly.
What You’ll Need
- Cup Plunger (for sink or shower drains)
- Flange Plunger (for toilet drains)
- A “zip-It” tool (for cleaning sink and shower drains)
How to Fix It
Toilet
- Put down some towels in case water spills out of the bowl.
- Make sure you’re wearing footwear that will give you traction.
- Lower the soft rubber flap (or flange) in the underside of the flange plungers head into the toilet bowl’s drain. Insert at a straight, perpendicular angle.
- Maneuver the flange around until you feel the flap enter the toilet bowl’s drain.
- Push the plunger down slowly and pull back up repeatedly for about 30 seconds or until most of the water in the toilet bowl is gone.
- Flush the toilet to make sure the clog is cleared.
Sink
- Insert the cup plunger over the sink drain. Make the plunger’s handle as straight as you can to achieve the best angle possible.
- Push straight down onto the drain and pull back up for about thirty seconds to a minute. Make sure you’re feeling pressure when you try to pull the plunger back up.
- Run the sink’s water for long enough that you can see whether or not the clog has been taken care of.
- Insert the zip-it tool into the sink’s drain, maneuvering it until almost the entire barbed end is in the drain. Work the tool up and down for about 30 seconds to collect debris and hair.
- Run the sink again.
Shower
- Start with the zip-it tool to remove hair. Sometimes, plunging may simply push hair build-up further down.
- Depending on how much you removed with the zip-it, see if you’ve cleared the drain already.
- If the drain still isn’t working effectively enough, use the cup plunger and follow the steps in the sink category.
The next time you have a clog or a leaky faucet, give these fixes a try before you call. Chances are, you’ll be able to solve the problem yourself. Then, you’ll have a skill you can use for the rest of your life. Pretty nifty, huh? We have some more advice to give to the aspiring plumber, so keep an eye out for “How to Fix a Running Toilet” coming later this month.
In the meantime, you can learn about how to assemble your own plumber's toolkit, or how to prevent common plumbing problems like these from happening in the first place. If you end up with a plumbing problem you don’t think you can handle yourself, remember that you can always call us for a little help. We’ll make sure everything’s working the way it should be.
 Your Privacy Choices