Is your toilet running?
Then you better go catch it!
…
Are you still reading this? Ok, cool. We realize now that joking around with a person whose toilet won’t shut up was maybe not the best idea. How about we teach you how to fix the problem, no matter what it is? We’ll do our best to refrain from the jokes. It’ll be hard, but that’s why we’re pros.

Why It Happens
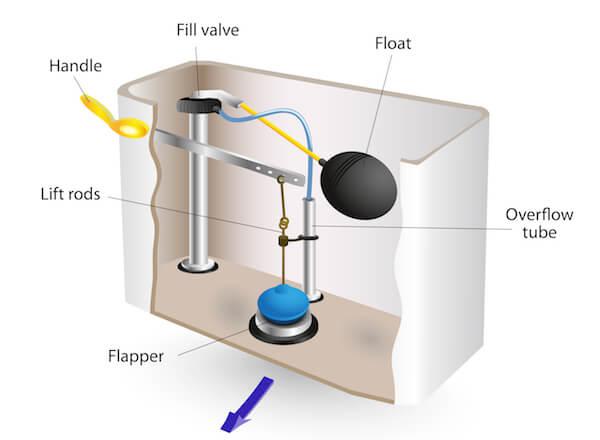
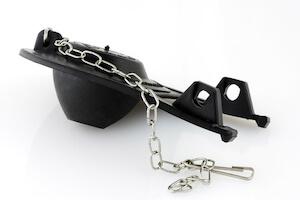
If your toilet runs for a long time after you use it, your flapper is probably the problem. A toilet’s flapper is a rubber stopper inside the tank. It’s usually black and connects to the toilet handle via a chain. When you depress the handle, you raise the stopper, which allows water to enter the toilet bowl.
The flapper functions similarly to an O-ring in a faucet, and when it wears down the same thing that happens in faucets happens in toilets. The running toilet sound you hear is the tank of the toilet refilling after its water is expended by the flush. When water from the tank leaks past a worn-down flapper into a bowl, it will take longer for the tank to refill with water between flushes.
If the flapper isn’t the problem, you should also check the fill tube, float, and fill valves. Here’s how to make sure each of these parts functions the way they’re supposed to, and what to do if they’re not:
Everything You May Need
- Replacement flapper
- Pipe-cutting tool
- Screwdriver
- A replacement fill valve
How To Fix It

Flapper
- Before draining the water, push down on the flapper. If the running toilet stops immediately, you need to replace the flapper (start at step 2). If you don’t think the flapper is the problem, skip to “Fill Valve” further below.
- Turn off the water to your running toilet. There should be a shutoff valve on the supply pipe behind the toilet.
- Flush the running toilet to drain the remaining water from the running toilet bowl and tank.
- Remove the worn-out flapper by detaching it from the handle and lifting it out of the tank.
- Make sure the replacement flapper you bought is identical in size, shape, and function to the one you’ve removed. Consider taking your old flapper to your hardware store to make sure.
- Follow the installation instructions that come with your replacement flapper. Make sure you add or remove links from the flapper’s chain until it’s taut when the handle raises the flapper.
Fill Tube
- If you determine the flapper wasn’t the problem, check the fill tube. The fill tube is a small plastic tube that runs from the main assembly in the tank to the overflow pipe. It’s responsible for refilling the toilet. Check to see where the fill tube ends.
- If the fill tube is underwater in your tank, cut it back until it’s above the water level using your pipe cutter. If the fill valve is properly sized, check the float next.

Float
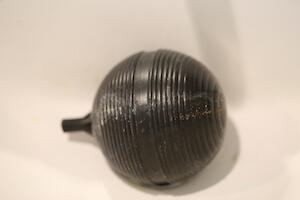
- The float monitors when the tank is full of water. It will look like either a small ball floating in the water itself or a cup attached to the fill tube.
- If the float is set too high, the water might keep filling until it has reached the overflow pipe. The overflow pipe will remove water until the level in the tank is back beneath it, at which point the float will tell the fill tube to activate. The toilet will never stop running!
- This step depends on which type of float you have.
Ball float: A ball float attaches to a metal arm either directly or via a chain. Manually bend the arm down so that the float rests lower in the tank.
Cup float: A cup float attaches to the fill valve. Slide the float further down the tube.
Fill Valve
- If you still haven’t solved the problem, you should replace your fill valve. Start by draining the tank, the way you would if you were replacing the flapper. Remember to turn the water off before you drain.
- Remove the fill valve from the running toilet by unscrewing it from the water main supply line and the lock nut outside the tank. Detach it from the refill tube, then lift it out of the tank.
- Either measure the fill valve or take it with you when you go to get a replacement.
- Attach the fill valve to the main water supply line, lock nut, and refill valve. Follow the instructions included with your specific replacement valve. Adjust the new valve’s float to make sure it’s in the right place.
This shouldn’t happen, but if you complete each of these steps and find you still haven’t solved the problem, give us a call. Chances are, some part of the toilet is improperly sized or worn out. We’ll be able to point out what went wrong and how you can fix it yourself in the future. Also, we’ll try to keep jokes to ourselves, for the most part.
Even if the problem turns out to be more significant than we imagined, we’ll be sure to fix it and prevent it from happening again. For more DIY goodness, check out what to do if something falls down your drain, how to avoid the common mistakes we see, and whether or not you should consider replacing your pipes. Good luck, and welcome to the world of plumbing!
