
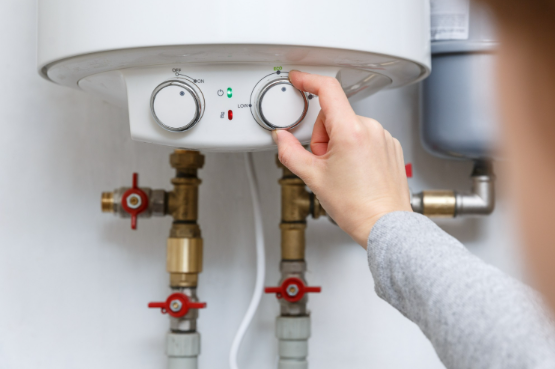
Your water heater works year round, but summer changes how hard it works and what it needs from you. Summer water heater maintenance matters because the season introduces a specific set of conditions that accelerate wear, reduce efficiency, and shorten equipment lifespan if they go unaddressed. Warmer incoming water temperatures, higher ambient heat in garages and utility closets, increased household water demand, and months of accumulated sediment all converge during the hottest part of the year.
Most homeowners in the Conroe and Montgomery County area do not think about the water heater until it stops producing hot water or starts leaking. By that point, the damage is done and the options are limited to emergency repair or replacement. A small amount of preventive attention during the summer months keeps the unit running efficiently, extends its useful life, and avoids the kind of mid-season failure that disrupts daily routines and forces rushed decisions.
The maintenance tasks described in this article apply to both tank and tankless systems, though the specifics differ. Each task targets a known failure point, and most of them take less than 30 minutes to complete or evaluate.
In this article, you will learn about:
- Why summer conditions specifically stress your water heater
- Sediment flushing and why it matters more than most homeowners realize
- Anode rod inspection and the corrosion it prevents
- Temperature and pressure relief valve testing
- Efficiency adjustments that reduce energy costs during peak heat
- When professional service is the right call
Keep reading to learn how to get your water heater through the summer without a breakdown and without wasting energy in the process.
Why summer conditions specifically stress your water heater
Water heaters are designed to operate within a range of conditions, but summer in Southeast Texas pushes several variables toward the upper end of that range simultaneously. Understanding why summer is harder on the equipment helps explain why maintenance timed to this season produces the best results.
The stress is cumulative, and it affects tank and tankless units differently.
Higher ambient temperatures in unconditioned spaces
In the Conroe area, most tank water heaters are installed in garages, attics, utility closets, or other spaces that are not climate controlled. During the summer months, ambient temperatures in a closed garage can exceed 110 to 120 degrees on a hot afternoon, and attic temperatures can climb well above 130 degrees.
A water heater operating in that environment does not need to work as hard to heat the water, because the incoming supply is already warmer and the tank loses less heat to the surrounding air. That sounds like an advantage, but it creates a secondary effect. The thermostat cycles less frequently, which means the burner or heating element fires in shorter intervals. In gas units, this pattern can accelerate wear on the gas valve and thermocouple. In electric units, shorter but more frequent element cycles contribute to element degradation over time.
Additionally, the high ambient heat increases the temperature of components that are not designed to stay hot continuously, including the T&P (temperature and pressure) relief valve, supply connections, and the tank jacket itself. Sustained heat exposure accelerates the breakdown of rubber gaskets and seals at connection points.
Warmer incoming water and sediment acceleration
Municipal water entering homes in the Conroe and Montgomery County area during summer months is noticeably warmer than the winter supply. Incoming water temperatures that hover around 55 to 60 degrees in January can climb to 75 to 80 degrees or higher by July.
Warmer incoming water changes the heating dynamics inside the tank. The temperature differential between the incoming cold supply and the thermostat set point is smaller, so the burner runs for shorter periods. While that reduces energy consumption per cycle, it also means the water sits in the tank for longer periods between heating cycles, which gives dissolved minerals more time to precipitate out of suspension and settle to the bottom as sediment.
According to the U.S. Department of Energy, sediment buildup reduces the efficiency of gas water heaters by insulating the tank bottom from the burner flame, forcing the unit to work harder and longer to transfer heat through the sediment layer. In electric water heaters, sediment buries the lower heating element, which causes the element to overheat and fail prematurely. Either way, the sediment that accumulates faster during summer months is the single biggest maintenance issue most homeowners can address on their own.
Increased household water demand
Summer brings higher overall water consumption. More showers, more laundry from outdoor activities, pool use, guest visits, and general household activity all increase the volume of hot water the system needs to produce. A water heater that is adequately sized for normal usage may struggle to keep up during peak summer demand, particularly if sediment buildup has already reduced its effective capacity.
If your household has noticed that hot water runs out faster during the summer than it used to, the issue is often not a failing unit but a unit that has lost capacity to sediment accumulation. A flush can restore the full volume of the tank and resolve the issue without any parts replacement.
Sediment flushing and why it matters more than most homeowners realize
Flushing the tank is the single most important maintenance task for any tank-style water heater, and it is the one that homeowners skip most often. The process removes the mineral sediment that accumulates on the tank floor, restoring heating efficiency and preventing the cascade of problems that sediment causes when it is left to build up.
This section explains the process, the frequency, and the consequences of neglecting it.
What sediment does inside the tank
Every gallon of water that enters your water heater carries dissolved minerals, primarily calcium and magnesium. As the water heats, those minerals precipitate out of solution and settle to the bottom of the tank as a layer of sedite-like material that hardens over time.
In a gas water heater, the burner sits directly beneath the tank bottom. The sediment layer insulates the tank floor from the flame, which means the burner runs longer to achieve the same temperature rise. That extended runtime wastes energy, overheats the tank bottom, and can cause the glass lining to crack, which exposes the steel tank wall to corrosive water and accelerates tank failure.
In an electric water heater, the lower heating element is submerged in the water near the tank bottom. Sediment buries the element, trapping heat against its surface. The element overheats, the thermostat reads the temperature inaccurately, and the element burns out prematurely. Replacing a heating element is a straightforward repair, but replacing the same element repeatedly because the underlying sediment issue was never addressed is a waste of money.
The sediment also takes up physical space inside the tank. A 50-gallon tank with two to three inches of compacted sediment on the bottom may only hold 40 to 42 gallons of usable hot water. That lost capacity is often the real reason hot water seems to run out faster than it should.
How to flush a tank water heater
The flushing process is accessible to most homeowners with basic tools and a garden hose. The steps are as follows.
- Turn the thermostat to the "pilot" or "vacation" setting on a gas unit, or switch off the breaker for an electric unit. Never drain a tank with the heating element or burner active.
- Connect a garden hose to the drain valve at the base of the tank. Run the hose to a floor drain, a driveway, or another location where hot, sediment-laden water can discharge safely.
- Open the drain valve and let the water flow until it runs clear. This may take five to ten minutes depending on the amount of sediment.
- If the flow is weak or stops, sediment may be clogging the valve. Opening the T&P relief valve on the top of the tank can break the vacuum and restore flow.
- Once the water runs clear, close the drain valve, remove the hose, and restore power or relight the pilot.
The Department of Energy recommends flushing tank water heaters at least once per year. In areas with moderate to hard water, such as much of the Montgomery County water service area, flushing every six months during the seasonal transitions, once in spring and once in fall, provides better protection.
When flushing is not enough
If the water heater has not been flushed in several years, the sediment may have hardened into a layer that will not drain through the valve. In that case, the valve may clog repeatedly, or the water may run continuously discolored without clearing.
When accumulated sediment is too compacted to flush, a professional service call is the next step. A licensed plumber can evaluate whether the sediment can be broken up and removed or whether the tank has sustained enough internal damage from the buildup that water heater replacement is the more practical option. A unit that has been running on a thick sediment layer for years may have compromised its glass lining, and flushing at that point can expose damage that was previously hidden beneath the sediment.
Anode rod inspection and the corrosion it prevents
The anode rod is a metal rod, typically magnesium or aluminum, suspended inside the tank from the top. Its purpose is to corrode in place of the tank wall, a process called sacrificial corrosion. As long as the anode rod is present and has material remaining, it attracts the corrosive elements in the water and protects the steel tank.
When the anode rod is consumed, the corrosion shifts to the tank itself, and once the tank wall begins to corrode, the damage is irreversible. Inspecting and replacing the anode rod at the right time is the single most effective way to extend the life of a tank water heater.
How to check the anode rod
The anode rod threads into a fitting on top of the tank, usually accessible through a hex head that requires a 1-1/16 inch socket. Turn off the water supply and relieve the tank pressure by opening a hot water faucet in the house, then unscrew the rod.
A healthy anode rod has a solid core with visible material remaining around it. A rod that is heavily pitted, reduced to a thin wire, or coated in calcium deposits has reached or exceeded its useful life and should be replaced.
If you cannot remove the rod because it is seized in the fitting or because clearance above the tank is insufficient, a plumber can handle the extraction during a routine water heater repair visit. Flexible anode rods are available for installations with limited overhead clearance, such as units installed in low-ceiling closets or beneath cabinets.
Replacement intervals
In most water conditions, an anode rod lasts three to five years. In harder water or in homes where the water heater runs at higher temperatures, the rod may deplete faster. Checking it annually and replacing it when it shows significant depletion is the safest approach.
According to research published by the National Institute of Standards and Technology, corrosion in hot water storage systems accelerates with temperature and water chemistry. The warmer the water and the more dissolved minerals present, the faster the sacrificial anode depletes. In the Montgomery County area, where summer water temperatures are already elevated and the mineral content is moderate, annual inspection of the rod during summer maintenance is well timed.
Replacing an anode rod costs a fraction of replacing the tank. It is one of the highest-return maintenance investments available for any tank-style water heater.
Temperature and pressure relief valve testing
The T&P (temperature and pressure) relief valve is the primary safety device on your water heater. It is designed to open automatically if the water temperature exceeds 210 degrees Fahrenheit or if the tank pressure exceeds 150 psi, either of which could cause a catastrophic tank failure without the valve.
Testing the T&P valve during your summer maintenance confirms that it is functional and not stuck closed by mineral deposits or corrosion.
How to test the valve
Place a bucket or towel beneath the discharge pipe connected to the T&P valve. Lift the lever on the valve briefly and let it snap back. You should hear a rush of water through the discharge pipe, and a small amount of hot water should release into the bucket.
If nothing happens when you lift the lever, the valve may be seized. If the valve does not reseat and water continues to flow after the lever is released, the valve is failing and needs replacement. Both conditions require professional attention, because a non-functional T&P valve is a safety hazard.
The International Plumbing Code requires every water heater to have a properly functioning T&P relief valve, and the discharge pipe must terminate within six inches of the floor or to an approved drain location to prevent scalding. During your test, confirm that the discharge pipe routes to a safe location and is not capped, plugged, or reduced in diameter, all of which are code violations that compromise safety.
When to replace the valve
T&P valves should be replaced every five years or whenever they fail to operate correctly during a test. The valve itself is inexpensive, and the replacement is a routine task for any licensed plumber. Given that the valve is the last line of defense against overpressure conditions inside the tank, keeping it functional is non-negotiable.
If you notice water dripping from the T&P discharge pipe when no test is being performed, the valve may be responding to excess pressure in the system. This can indicate a failing expansion tank, a malfunctioning pressure-reducing valve, or thermal expansion issues in a closed plumbing system. A plumbing inspection can diagnose the root cause and prevent both the nuisance drip and the underlying pressure issue.
Efficiency adjustments that reduce energy costs during peak heat
Summer is the ideal time to evaluate your water heater's efficiency settings, because the seasonal conditions allow you to reduce energy consumption without sacrificing comfort. A few simple adjustments can produce measurable savings on your utility bill through the warmest months.
These adjustments apply to both tank and tankless water heaters, though the specifics differ by system type.
Lower the thermostat setting
Most water heaters ship from the factory with the thermostat set to 140 degrees Fahrenheit. The U.S. Department of Energy recommends setting the thermostat to 120 degrees for most households. This lower setting reduces energy consumption, slows mineral buildup, and decreases the risk of scalding at fixtures.
During the summer, when incoming water is already warmer and ambient temperatures reduce standby heat loss, lowering the set point to 120 degrees has an even larger impact on efficiency. The unit cycles less often, the burner or element runs for shorter intervals, and the total energy consumed per day drops.
If anyone in the household is immunocompromised, the CDC recommends maintaining the water heater at 120 degrees or higher to prevent Legionella bacteria growth inside the tank. The 120-degree setting satisfies both the efficiency recommendation and the minimum temperature for bacterial prevention.
Insulate the tank and exposed pipes
If your water heater is in an unconditioned space like a garage, an insulating blanket can reduce standby heat loss. Modern water heaters are better insulated than older models, but units installed in environments where the ambient temperature swings from mild to extreme, which describes most Southeast Texas garages, still benefit from additional insulation.
Wrap the first six to ten feet of the hot water outlet pipe with foam insulation as well. This keeps the water in the pipe hotter for longer after the heater cycles off, which reduces the amount of cooled water that must be purged before hot water reaches the faucet. In a home where the water heater is far from the kitchen or master bathroom, this simple addition can noticeably reduce the wait time for hot water and the water wasted during the wait.
Evaluate the expansion tank
If your home has a pressure-reducing valve or a backflow preventer on the main supply line, the plumbing system is "closed," meaning heated water that expands inside the tank has no path to push back toward the main. In a closed system, an expansion tank absorbs that thermal expansion and prevents pressure spikes that can damage the water heater, the T&P valve, and the plumbing fixtures throughout the house.
Check the expansion tank during your summer maintenance. Press the Schrader valve on top of the tank with a tire gauge. If water comes out instead of air, the bladder inside the tank has failed and the tank needs replacement. If the gauge shows no pressure or very low pressure, the tank may need to be recharged.
A failed or undercharged expansion tank allows pressure to cycle up and down with every heating cycle, which accelerates wear on every valve, fitting, and appliance connection in the house. Replacing the tank is a straightforward task for a licensed plumber and prevents a cascade of pressure-related problems.
When professional service is the right call
Several of the maintenance tasks described in this article are accessible to a confident homeowner. Flushing the tank, testing the T&P valve, and adjusting the thermostat are all manageable with basic tools and reasonable care. Other tasks, and certain findings during your self-inspection, warrant a professional visit.
Knowing when to call ensures that problems are handled correctly the first time and that you do not accidentally create a new issue while trying to resolve an existing one.
Situations that require a licensed plumber
Schedule a professional service appointment if you encounter any of the following during your summer maintenance.
- The anode rod is seized and will not unscrew, or the tank fitting is corroded to the point where forcing the rod risks damaging the tank
- The T&P valve does not operate during testing, or it continues to drip after being reseated
- The drain valve is clogged with sediment and will not flush after multiple attempts
- You notice rust-colored water coming from the hot water side only, which may indicate internal tank corrosion that has progressed past the point where an anode rod replacement can help
- The unit is making popping, rumbling, or banging noises during the heating cycle, which is typically caused by sediment boiling beneath the heating element or on the tank floor and suggests heavy accumulation that may need professional removal
- The water heater is leaking from the base of the tank, the supply connections, or the T&P valve discharge, all of which require hands-on diagnosis to determine whether a repair is feasible or whether replacement is the better path
Tankless system maintenance
Tankless water heaters require a different maintenance approach. They do not accumulate sediment in a tank, but they do develop mineral scale on the heat exchanger, which reduces flow rate and heating efficiency.
Descaling a tankless unit involves circulating a vinegar or descaling solution through the heat exchanger using a pump and a pair of service valves. The procedure takes about 60 to 90 minutes and should be performed annually, or more frequently in areas with harder water.
If your home has a tankless system and you have never had it descaled, or if you have noticed a decline in flow rate or temperature consistency, summer is an ideal time to schedule the service. The unit is working less hard than it does in winter, which makes the scheduled downtime less disruptive.
Conclusion
Summer water heater maintenance is a short list of targeted tasks that protects a major household appliance from the conditions that cause it to fail prematurely. Sediment flushing, anode rod inspection, T&P valve testing, thermostat adjustment, and a check of the expansion tank take less than a morning and can add years to the life of the unit while keeping your energy costs under control.
The alternative is neglect, which costs more in every measurable way. A water heater that runs on compacted sediment consumes more energy, delivers less hot water, and is on a shorter path to catastrophic failure than one that receives basic seasonal attention. A depleted anode rod means the tank itself is corroding from the inside out, and once that process starts, no maintenance can reverse it.
If your water heater has not been serviced this year, or if your summer inspection revealed a condition you are not comfortable addressing on your own, call Benjamin Franklin Plumbing of Conroe to schedule a professional water heater maintenance appointment. A small investment in preventive service now prevents an expensive and inconvenient failure later.

 Your Privacy Choices